Make sure that all lines/areas to be processed by the laser cutter meet the following parameters:
Cut = Red(RGB 255, 0, 0) (Hairline / 0.01mm thick)
Engraved Line = Black (RGB 0, 0, 0) (Hairline / 0.01mm thick)
Engraved Area = Blue (RGB 0, 0,255) (Hairline / 0.01mm thick)
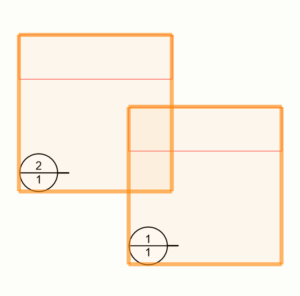 Wrong.
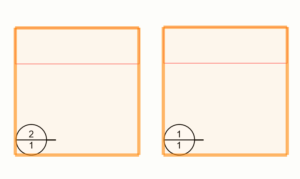 Correct.