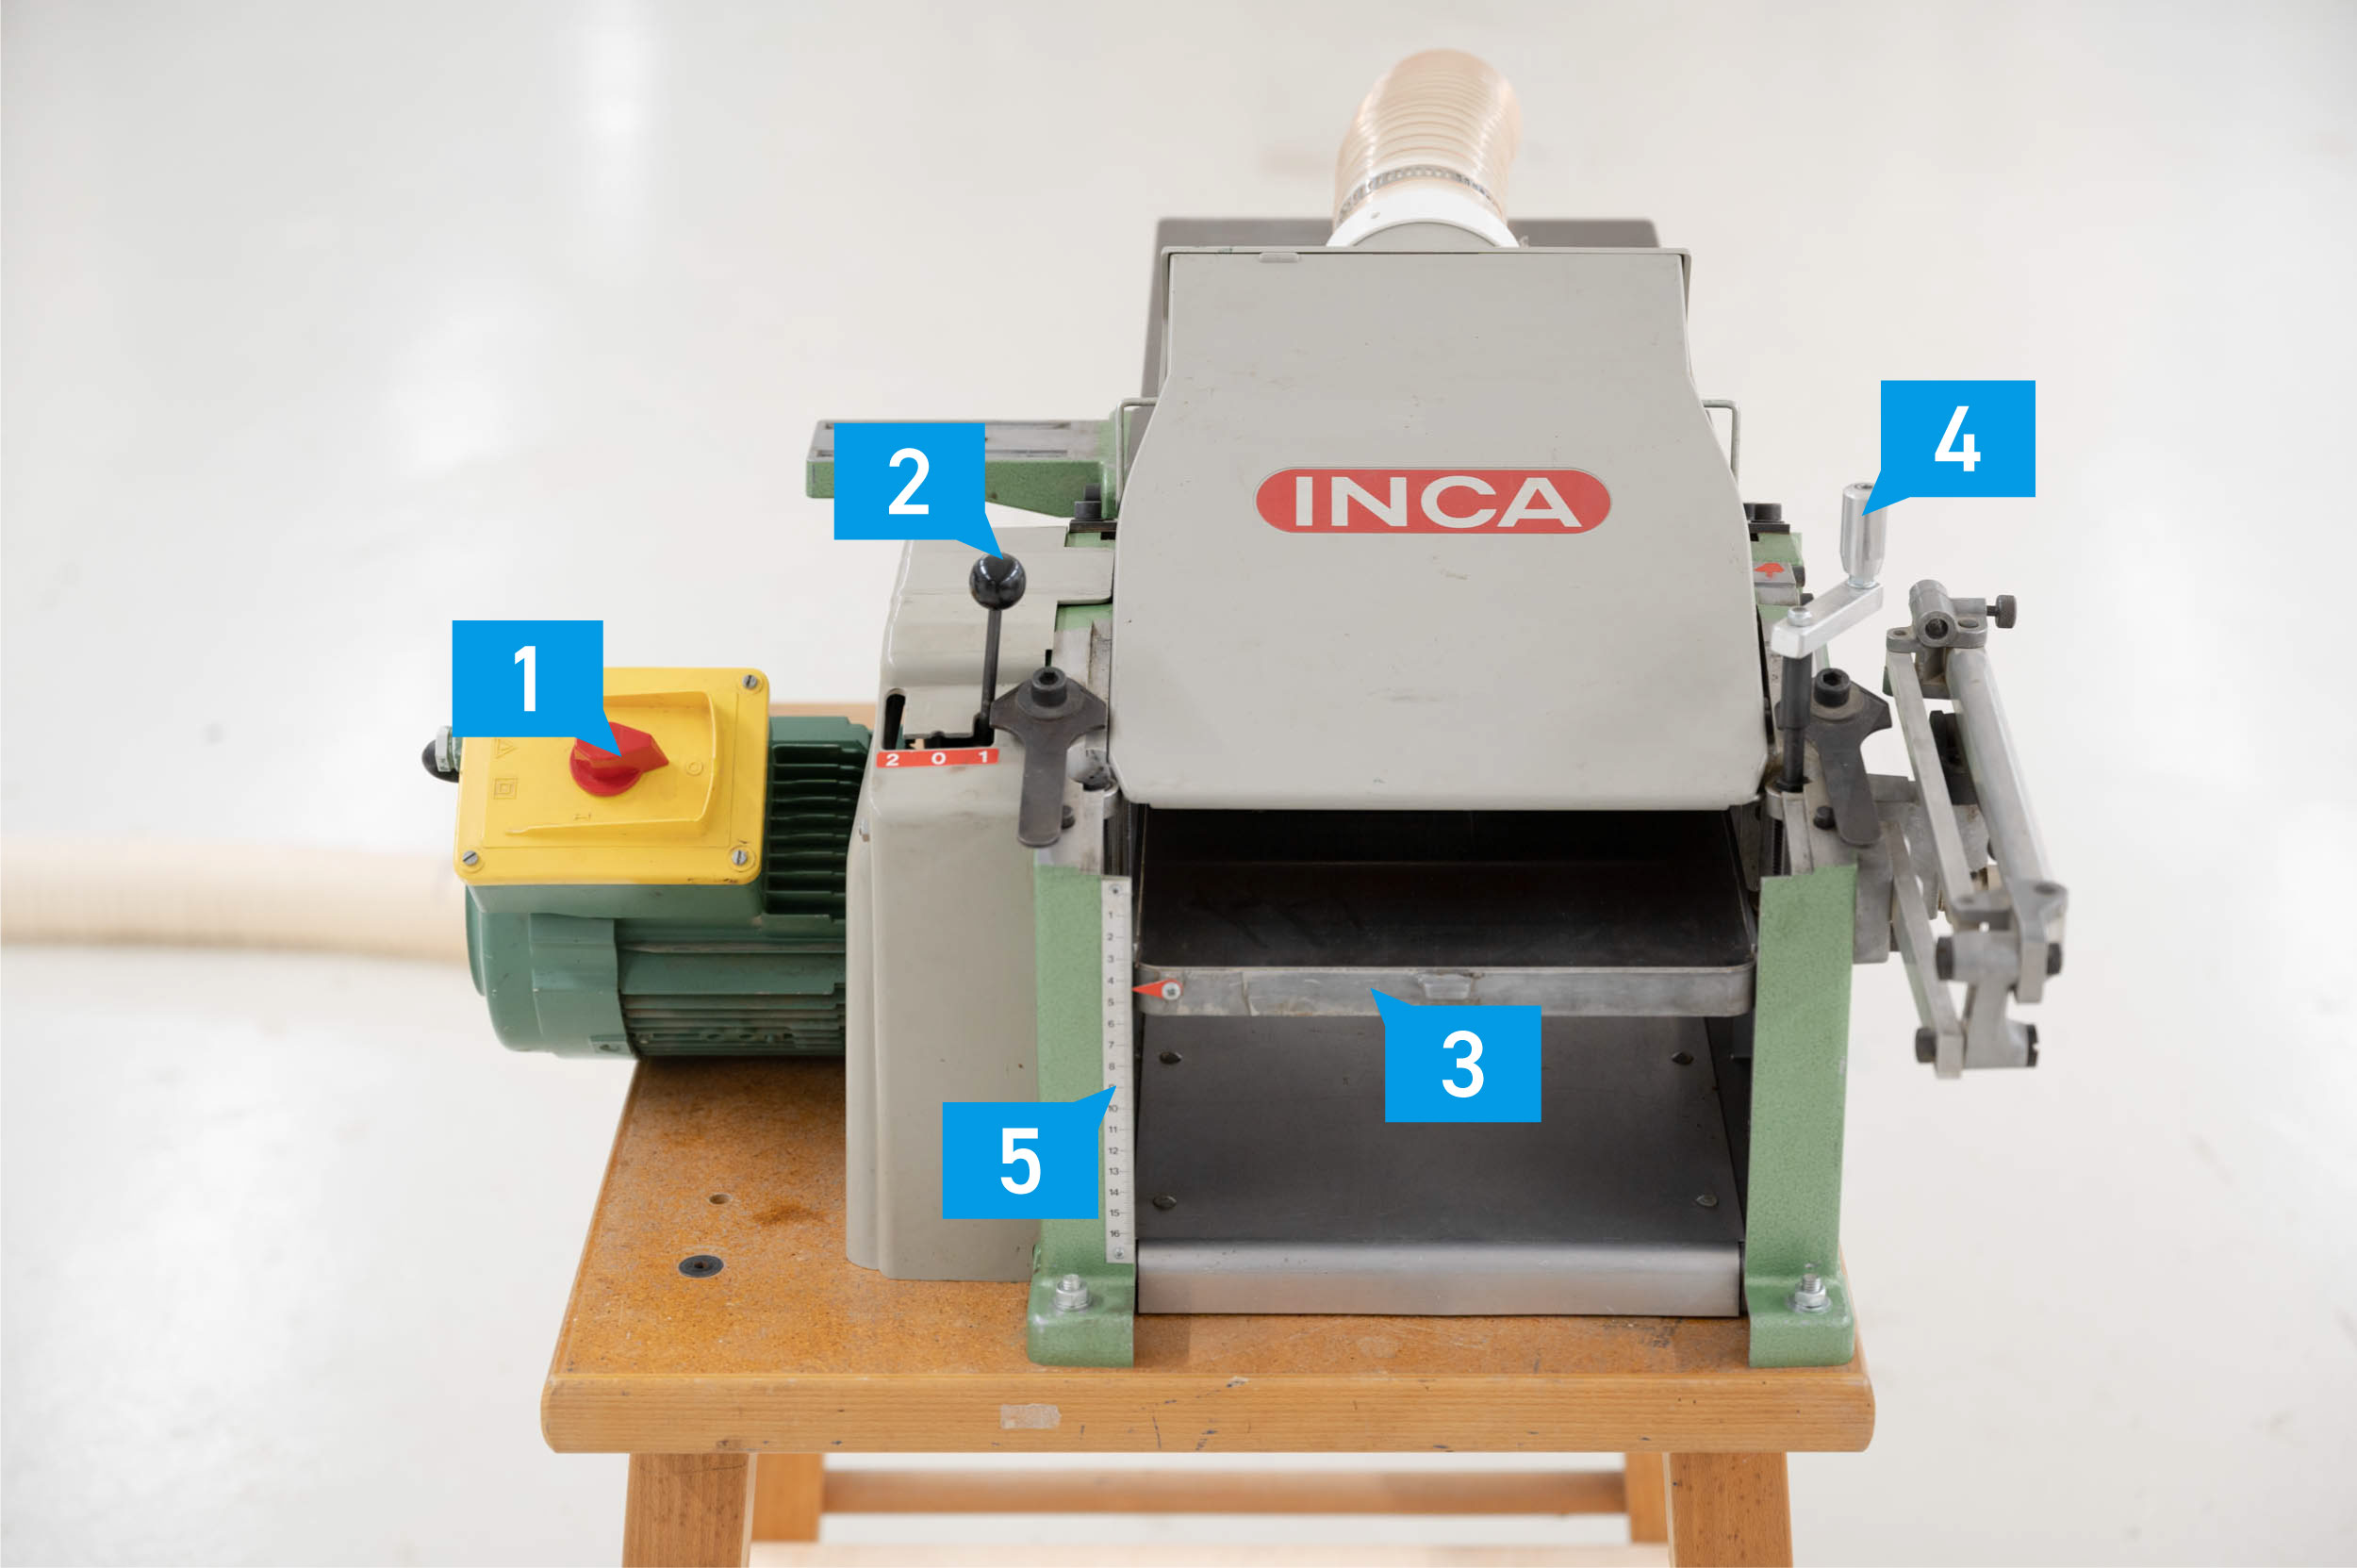
The planer is used to plane solid wood to a defined thickness and is a helpful machine for adjusting the size of laths. When using the planer, be sure only to plane the faces that are side- or flat-grain and avoid end-grain altogether. Use the disc sander to remove small amounts of material from the end grain.
Model builders use the planer to bring the stock to a specific dimension before cutting it to length on the bandsaw or with other machines and techniques. This order of operation is essential because the planer can only handle pieces longer than 250mm due to its construction with the infeed-, cutter head, and outfeed roll.

#1 Power switch
#2 Feed rate shift handle
#3 In/out feed table
#4 Table raising/lowring handwheel
#5 Debth of cut scale
The planer is strictly made for processing clean, dry, solid timber without any fasteners or nails inside. Other materials can damage the machine or result in injury and must not be used on this machine. The workpieces to be planed have to be flat on at least one side and can not be shorter than 250mm.
Turn the machine on and feed your workpiece into the machine with the side to be planed facing upwards. When the feed roller pulls the piece in, let it go, and do not guide or push the workpiece anymore. If your material gets stuck in the planer, turn the machine off, lower the table with the handwheel and remove the material carefully. Never reach inside the planer; there is a severe risk of injury if you do so!
The Inca automatic planer available at Raplab works best for smaller jobs. Thicknesses of approx. 5-100mm can be processed. The wider your workpiece is, the less material you can remove per pass. An indication of removing too much material is that the motor loses speed, characterized by an audible drop in machine noise.