Simple mold boxes are constructed with readily available materials and provide a flexible working method during design.
Many examples and considerations in this post work on a smaller scale suited for model building where concerns like hydrostatic pressure are secondary.
First of all, creating good castings takes time!
It involves making a positive, a negative, a casting, and, most of the time, some clean-up. The process can be more successful if you use the right combination of mold and casting material and learn how to hide seems in your model to allow for more complex assemblies.
Mold types:
The construction of the mold depends highly on its complexity. Undercuts and enclosures require careful planning of the casting process. The following mold typologies should serve as a guide to identify possible trouble spots when making your own molds.
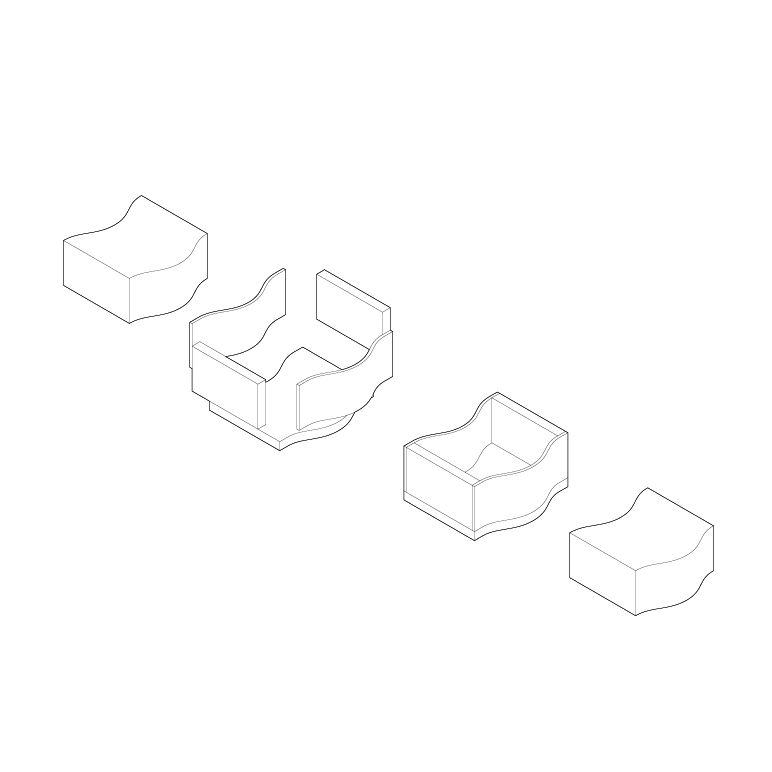
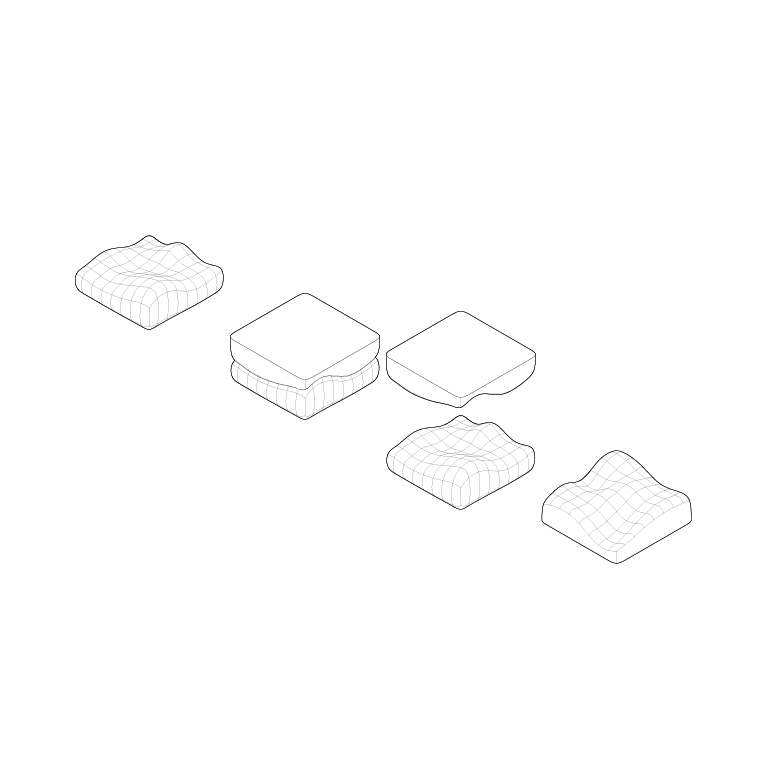
Mold with simple contours
This is the most common situation for producing small block-like shapes that can be used directly as buildings or, with some post-processing, be adjusted to become more complex. We recommend using foamcore and hot glue to construct simple molds like these.
Mold with complex contours
More complex shapes can be achieved by combining materials like foamcore and polystyrene plates or by using single-walled 3d-prints as molds.
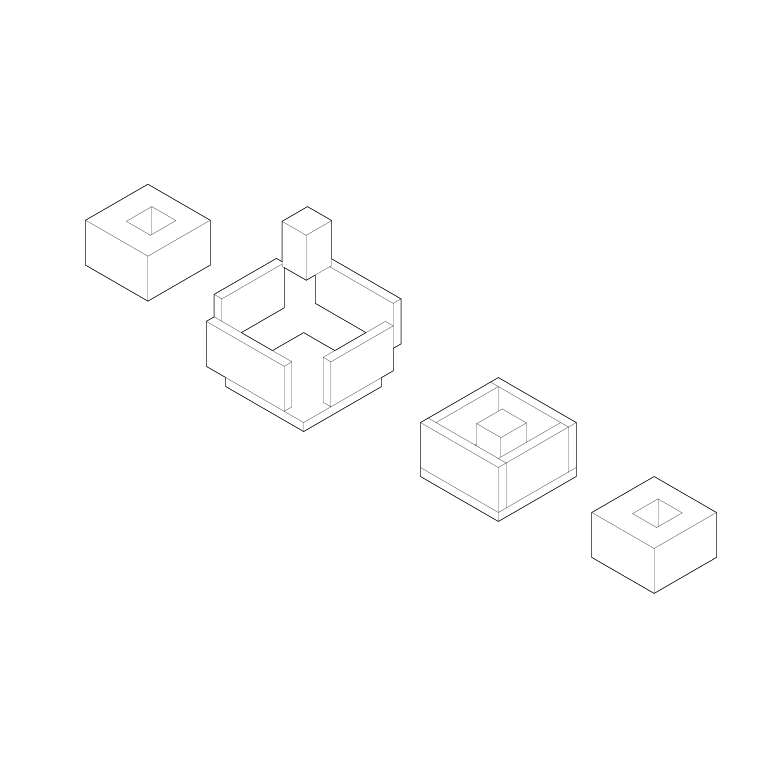
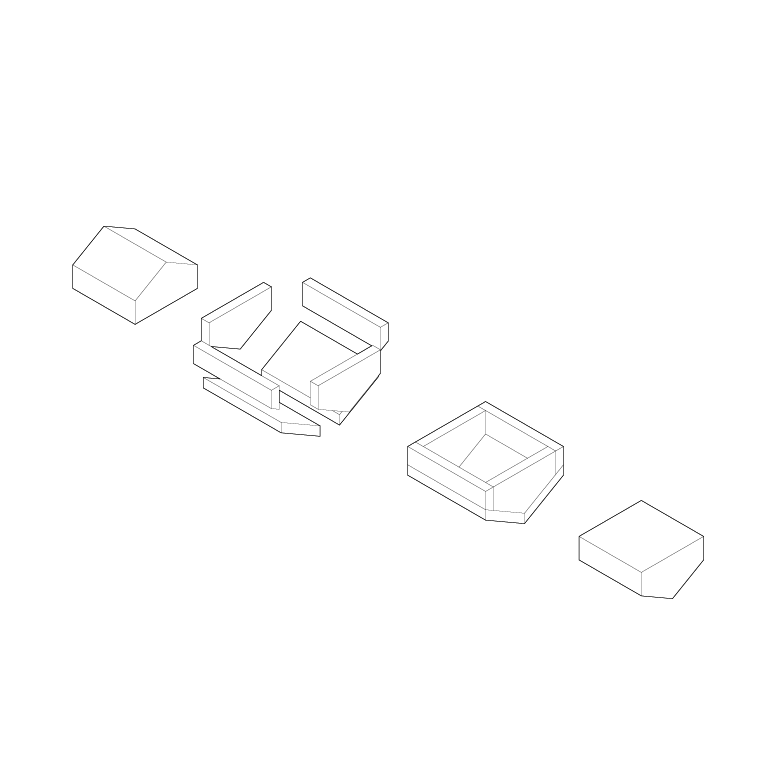
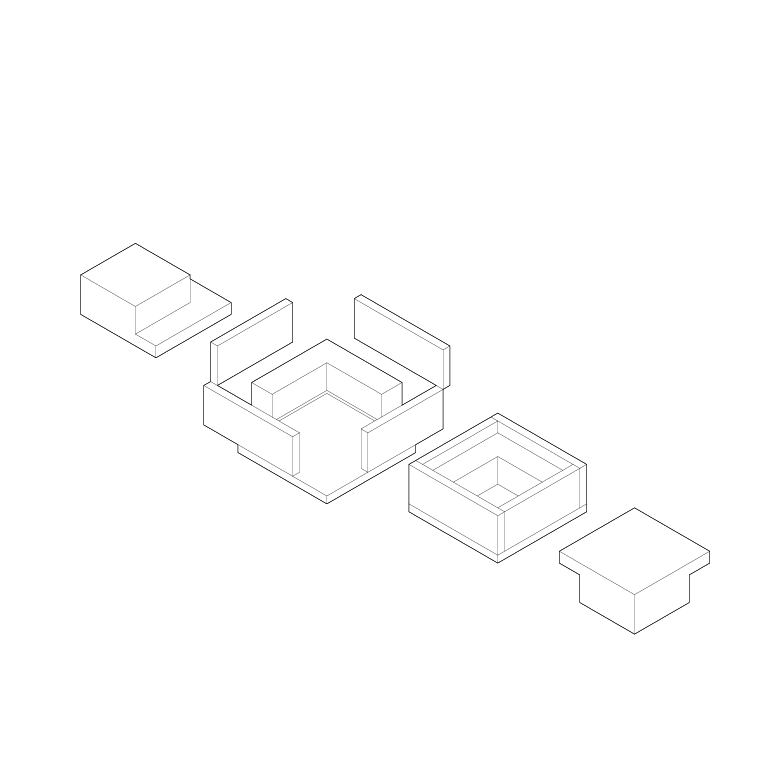
Mold with enclosure
Enclosures or details like windows or recesses can be realized with small blocks of styrofoam glued to the primary mold with double-sided tape or contact cement. The styrofoam is removed with a knife or other tools after the plaster has set.
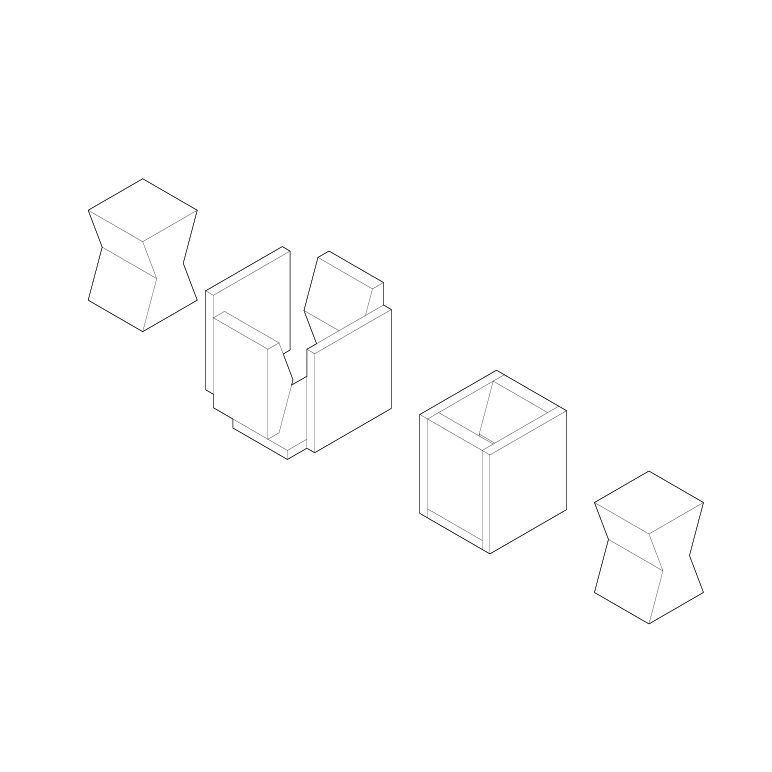
Mold with undercuts
More intricate shapes require multipart molds that can be disassembled without destroying the casting. In such cases, looking ahead to devise a strategy for removing the individual parts is vital.
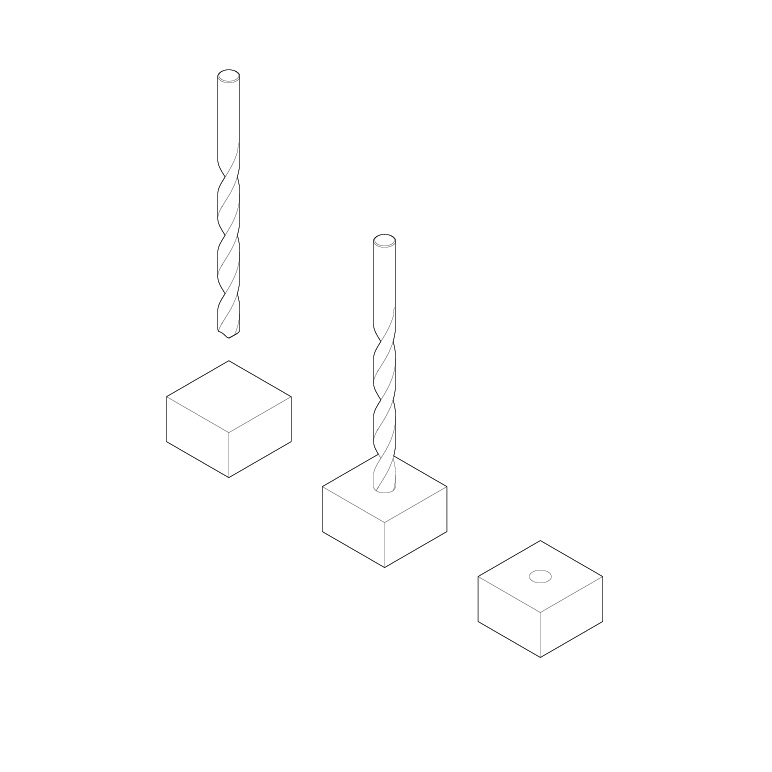
Post-processing
Features like holes, champers, and bevels can be done after the casting is made. Having a clear picture of what features are part of the mold design and what features can be done in a second step by drilling or carving speeds up the production of molds dramatically.
Working without a mold
Castings and reproductions of simple, one-sided parts can be made with clay or other sculptable materials by creating an impression that forms the mold.
Tips
Pouring direction
Thin sections
Undercuts / Enclosures -Try to avoid undercuts and enclosed parts, and consider splitting your shape into different parts -Undercuts and enclosures can lead to trapped air and incomplete castings
Disassembly logic -Build your molds with disassembly in mind.
Wall strength and minimal sections -Try to avoid lengthy and narrow sections as much as possible
Material combinations -Use material combinations that make sense. Cardboard and concrete are difficult to combine
The structural integrity of your mold -Build your mold strong enough and ensure it does not leak. Fill your mold with water before casting to identify possible weak spots.
Release agents -Separating agents can lead to cleaner castings with fewer surface defects if applied correctly
Mold-making materials
Good mold-making materials are easy to assemble, are non-porous, and provide the necessary flexibility to make changes on the go. Selecting a suitable mold-making material depends highly on the material that you want to cast and the result that you want to achieve.
Mold Material
Plaster
Concrete
Release Agent
White Cardboard
👍👍👍
👎
Release Spray
Grey Cardboard
👎
👎
Wax, Petrol Jelly, Shellac
Foamboard
👍👍
👍
Release Spray
Polystyrene
👍👍👍
👍👍👍
Release Spray
Styrofoam (EPS, XPS)
👍👍👍
👍👍👍
Petrol Jelly
MDF
👍👍
👎
Shellac
Chipboard
👎
👎
Plastic Tape
Phenolic Plywood
👍👍👍
👍👍👍
Release Spray
Timber
👍
👍👍👍
Release Oil
Clay
👍👍👍
👍
Talcum
Silicone
👍👍👍
👍👍
Release Spray
Polyurethane Rubber
👍👍👍
👍👍👍
Release Spray
Materials like MDF and cardboard are porous and unsuited for creating molds without applying separating agents to them.