Bandsaw

Safety Guide Lines

  • Use push sticks or blocks – keep your hands off the blade! 
  • Adjust the guide post to the workpiece thickness +2cm
  • Keep the worpiece flat on the worktable

Introduction

Bandsaws are typically used to cross-cut stock to a specific length, to rip material to width, or for joinery applications. The Bandsaw can be regarded as an advancement to manual sawing and helps speed up many operations that can also be done with a good handsaw
In our context, model, and prototype building, the bandsaw primarily prepares wood for final sanding on the disk sander. To execute our cuts, we either measure the distance from the sawblade to the fence while the saw is turned off, lay out our parts with pencil and cut to the line or print a template and mount it with spray adhesive to have a guide for cutting and sanding.

Machine Overview

#1 On/Off switch
#2 Saw blade guide assembly
#3 Rip fence
#4 Bin for offcuts
#5 Knob/wheel to adjust guide (#2) position
#6 Knob to lock height adjustment (#5)
#7 Guide post

Machine Handling

Sawblades

With a band saw, straight and curved cuts are possible, depending on the width of the blade. Wide blades (12-100+mm) are suitable for straight cuts and resawing. The blade shown here is a general-purpose blade used for rip- and cross-cutting of wood and wood products.

Narrow blades (1-8mm) facilitate curved cuts and allow for intricate work. The blade shown here is from our scroll bandsaw and is typically used for extremely small radii and cutting softer materials like styrofoam. 

Blade Guard Adjustment

Before turning on the band saw, set the machine in the correct position. The guide unit (#2) must be placed about 10mm above the workpiece and all workpieces must lay flat on the machine table.

In this image, the guide unit (#2) is not set correctly, and too much blade is exposed, leading to an inaccurate cut result and a potentially dangerous situation where the blade guard is ineffective in preventing injuries.

Rip Fence Settings

Use the rip fence if you need a straight cut with a precise width (#3). Please note that materials thicker than 80mm cannot be processed on our band saws. 

If the machine has two rip fences, the taller one is exclusively for resawing stock. Smaller stock should be cut with the lower rip fence to allow for the correct positioning of the blade guard. 

Push Sticks And Push Blocks

Use the official push sticks when you cut material close to the blade to protect your hands from injury. Your hands should always be further away than 10cm from the blade!

Other helpers and push blocks can be used if the push stick is not practical. They should be made of wood and protect the pushing hand adequately.

Curved Cuts

Cutting curves on a bandsaw with a broader blade is possible if you create incisions along the curve first, as shown in the image above.

This technique reduces the amount of curvature between the individual segments significantly so that the blade is able to follow the line accurately.


Miter Gauge

Use the miter gauge in combination with the rip fence for repetitive cuts. Combining the two fences guarantees accurate and repeatable results and puts your hands out harm’s way.

The miter gauge can be set to any angle between +/-45 degrees and helps to produce precise mitered cuts. 

Additional Bandsaw Jigs

Jigs become necessary for cutting workpieces that do not have flat support or cannot be guided easily on the machine table. These jigs can vary from simple dowel-cutting helpers to complex and elaborate setups for “free-form” work. 

The Raplab has prefabricated jigs that allow safe and precise cutting of the most common angles to produce profiles useful in architectural model making.

1 Cutting jig 45° (also available, 22.5° / 26.6°)
2 Clamp to attach the aid to the rip fence
3 Workpiece

Cleaning

After the cut, switch off the machine and wait until the sawblade stands still before retracting the workpiece or removing any off-cuts.  Always clean the machine and its surroundings after use to prevent accidents and to provide a productive environment for the next person.

Acceptable Materials

Available Machines

  • Cutting width: 565mm
  • Table size: 610mm x 870mm
  • Cutting width: 365mm
  • Table size: 515mm x 400mm
  • Cutting width: 575mm
  • Table size: 560mm x 850mm

Risks

  • Cuts from pushing the workpiece by hand
  • Cuts from not correctly adjusting the blade guard
  • Injury from breaking the saw blade

    Work Safety

  • Adjust the blade guard to the appropriate height (10mm above the material)
  • The workpiece must rest on the machine table at all times
  • Use push sticks, push blocks, and the miter gauge to protect your hands
  • Keep your hands at a minimum safe distance from the sawblade at all times (approx. the distance of your fist)
  •  As a general guide, do not cut materials thicker than 80mm
  • Never work from behind the bandsaw, pulling the workpiece
  • Switch to the appropriate saw depending on the size of your workpiece
  • Turn the machine off and wait until the sawblade stops moving before pulling your work back or before removing any offcuts
  • Use only acceptable materials
  • Please adhere to our general work safety guidelines (link)

Summary

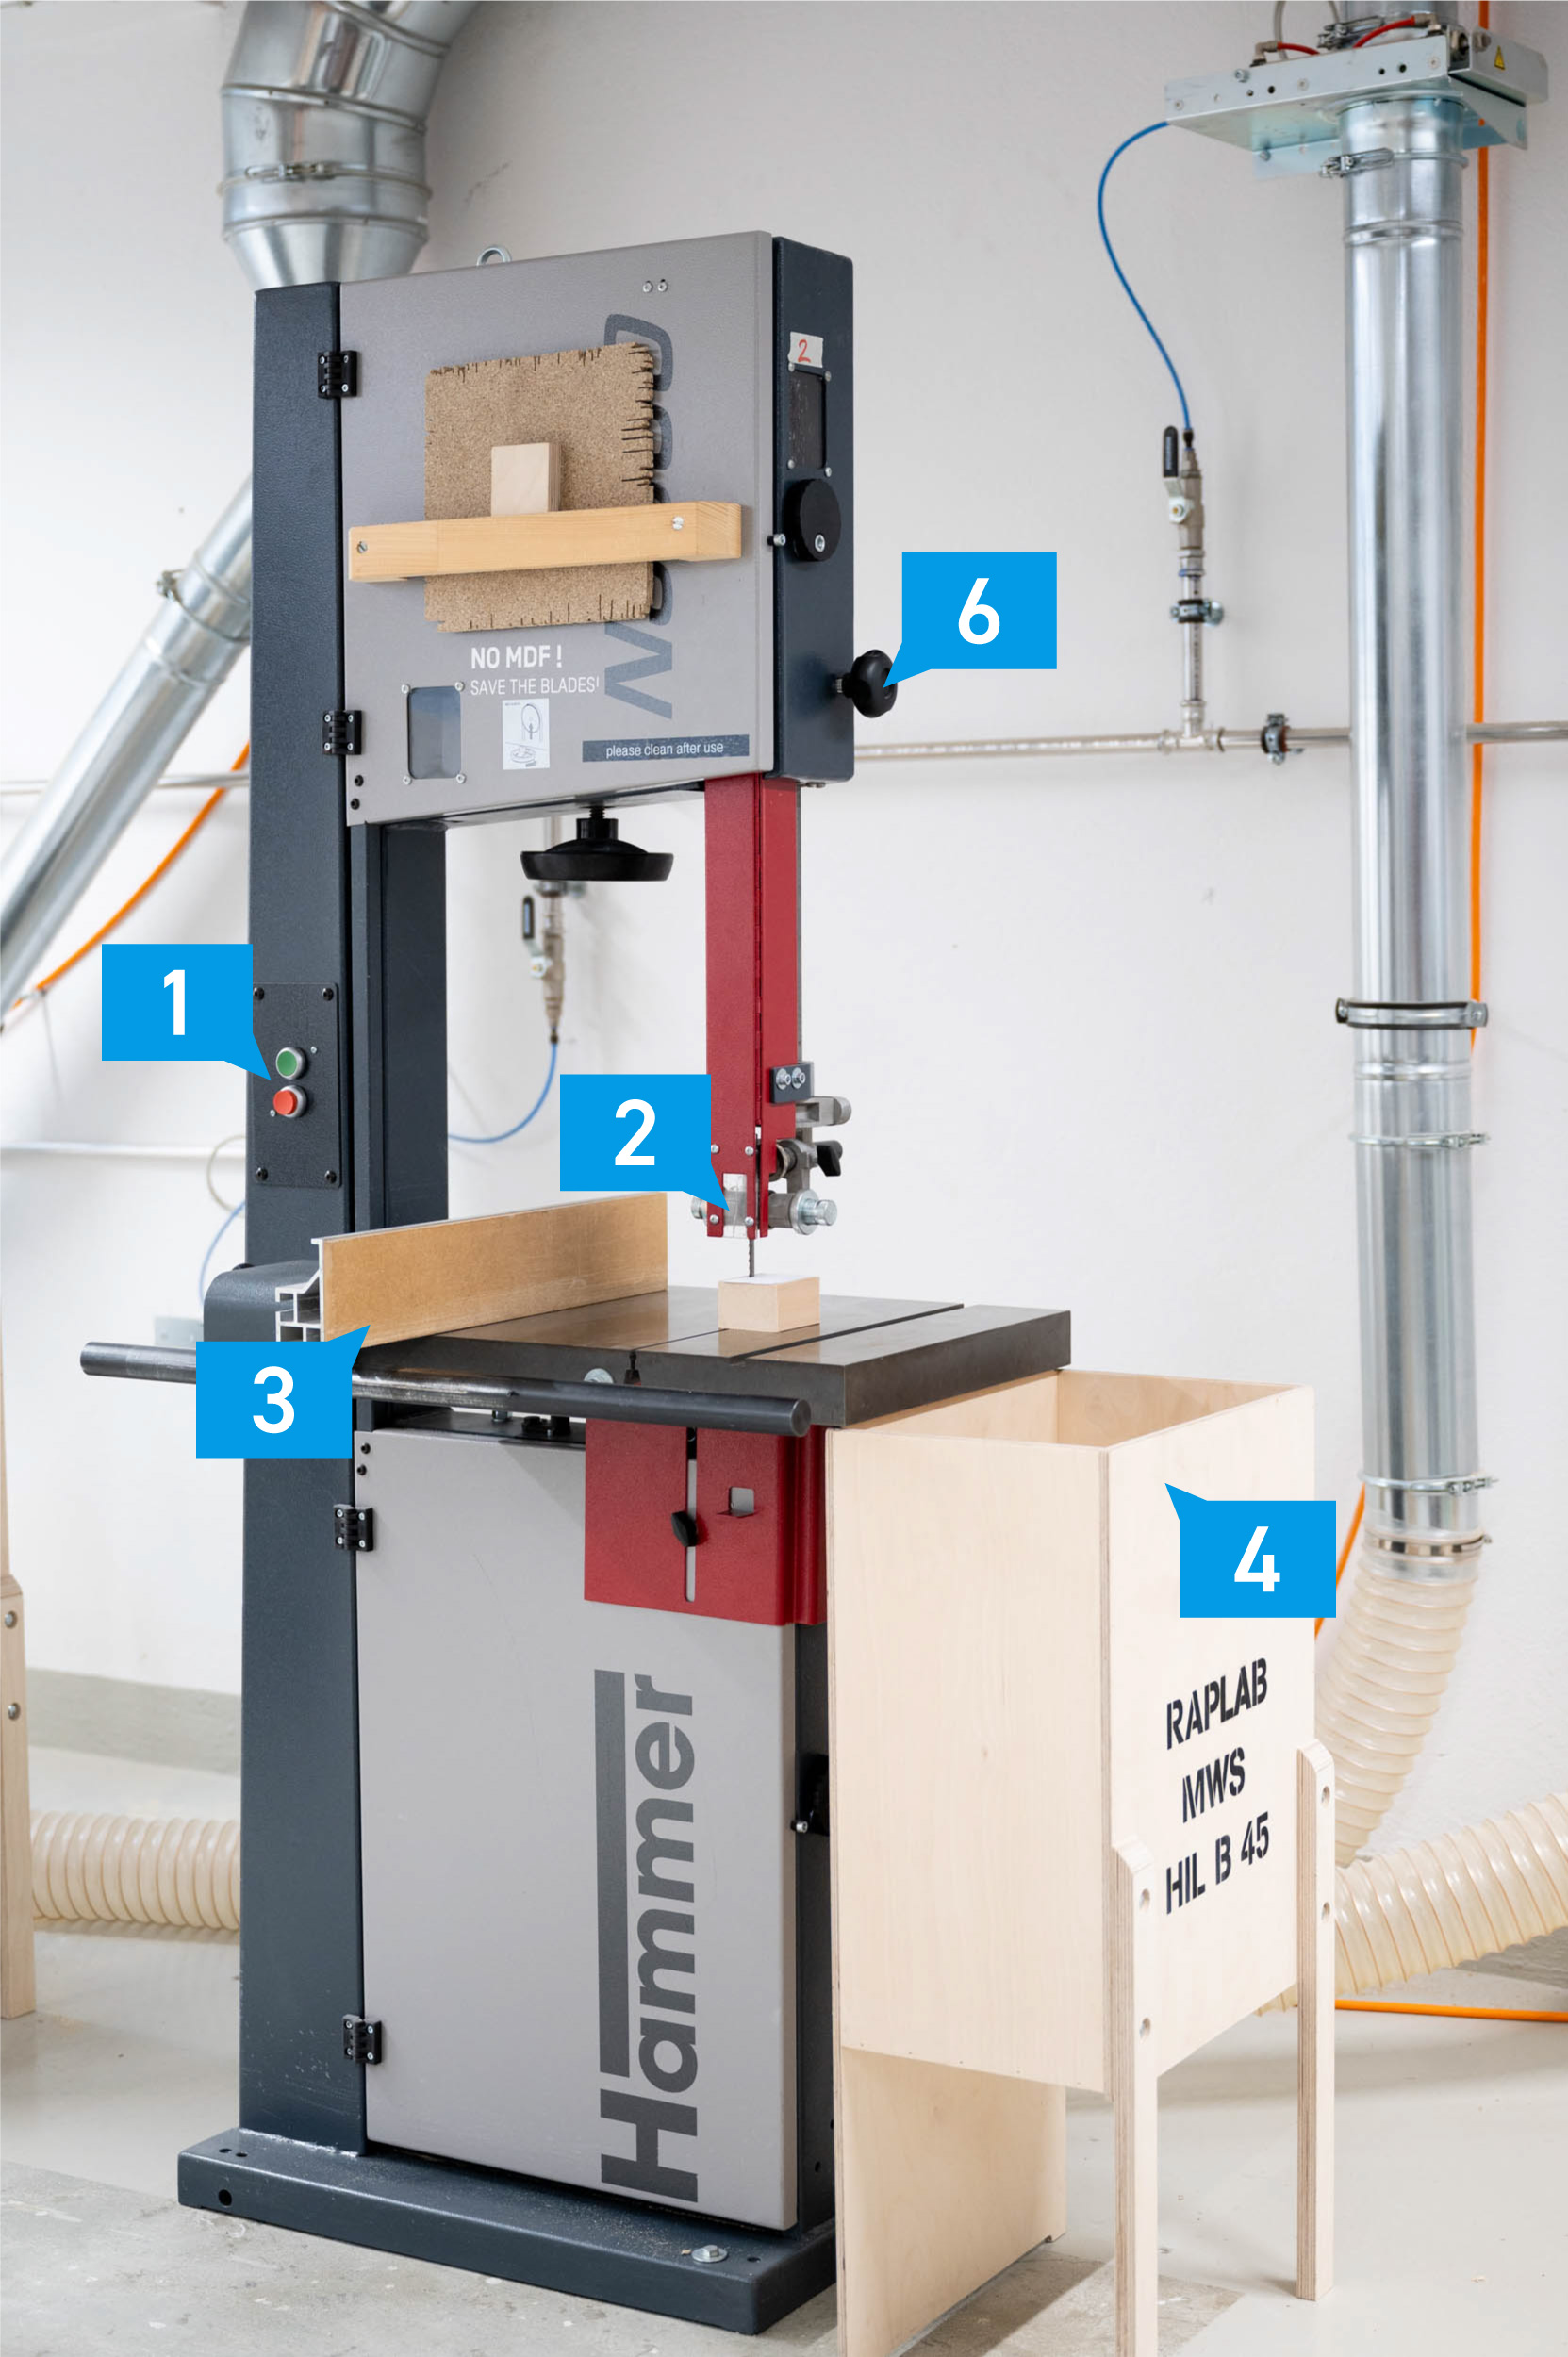
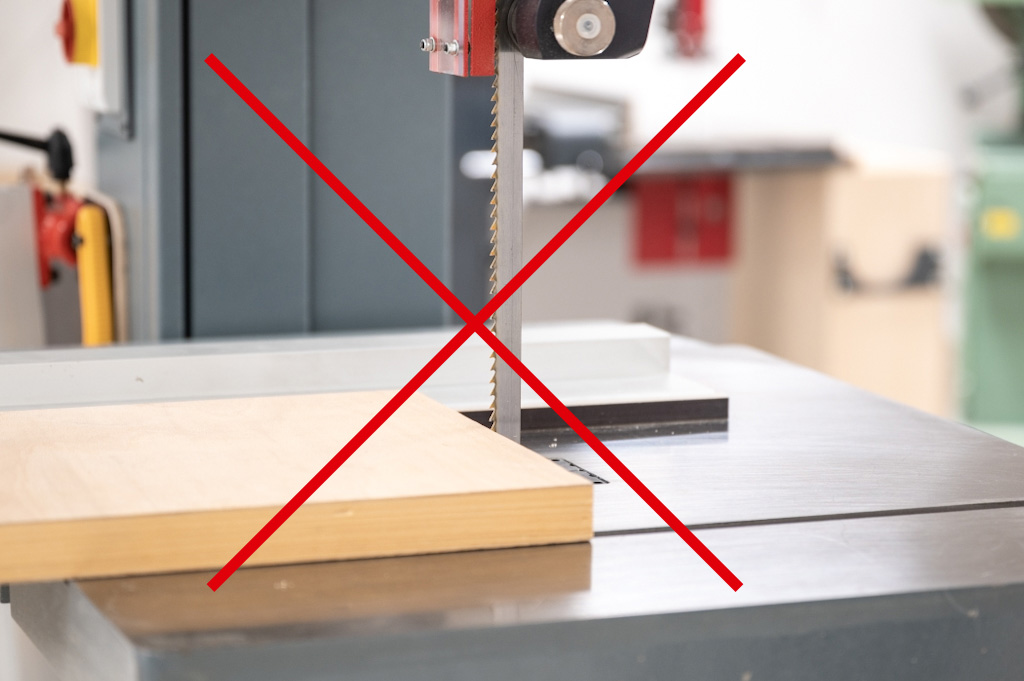
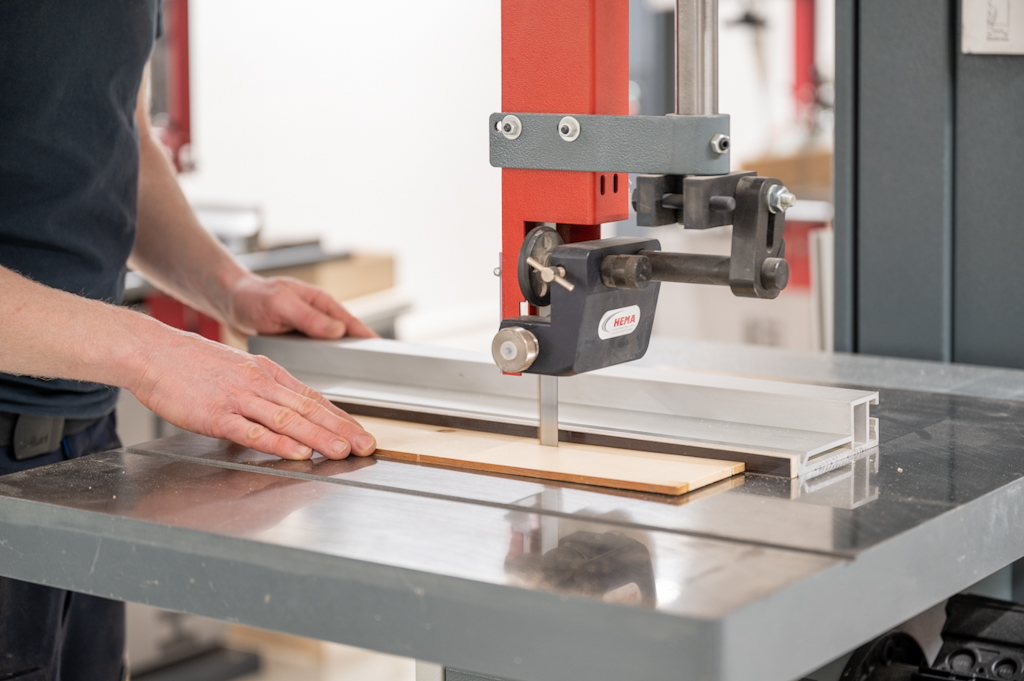
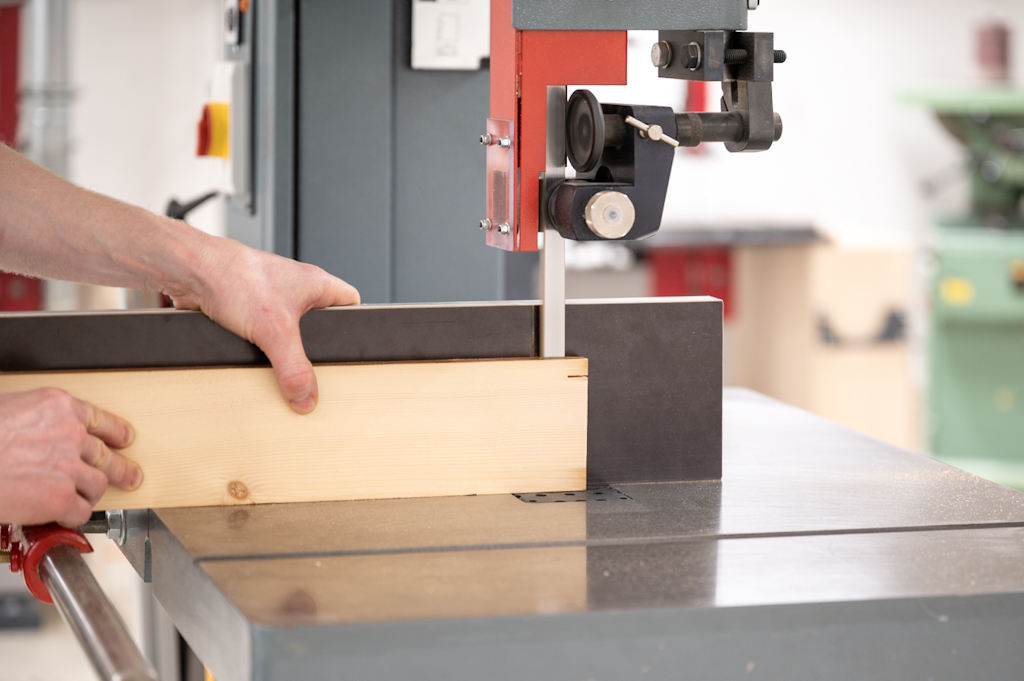
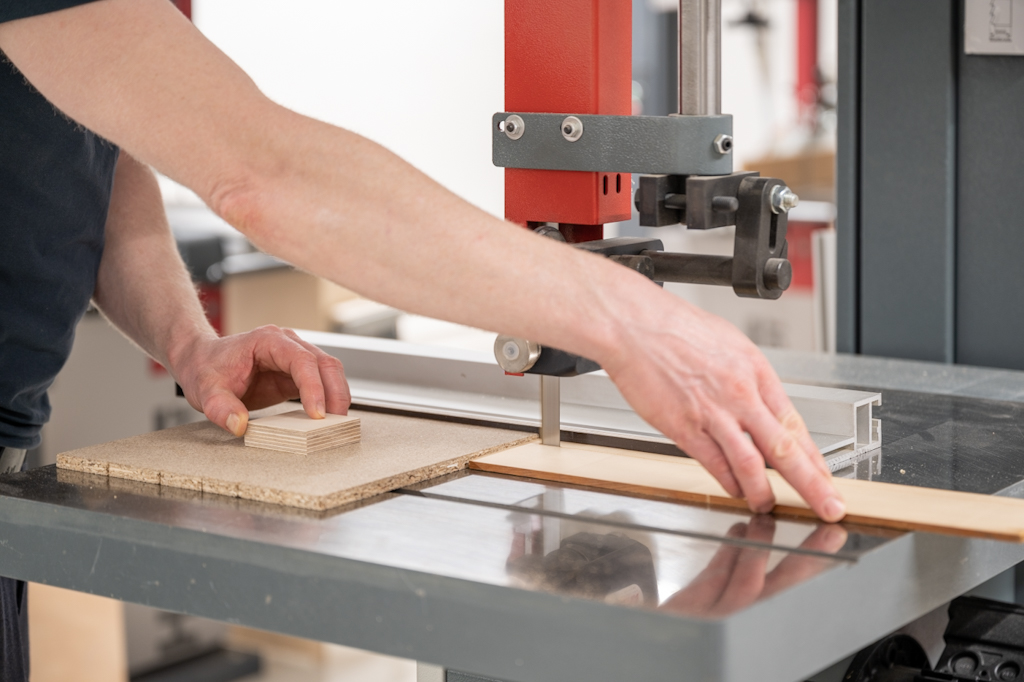
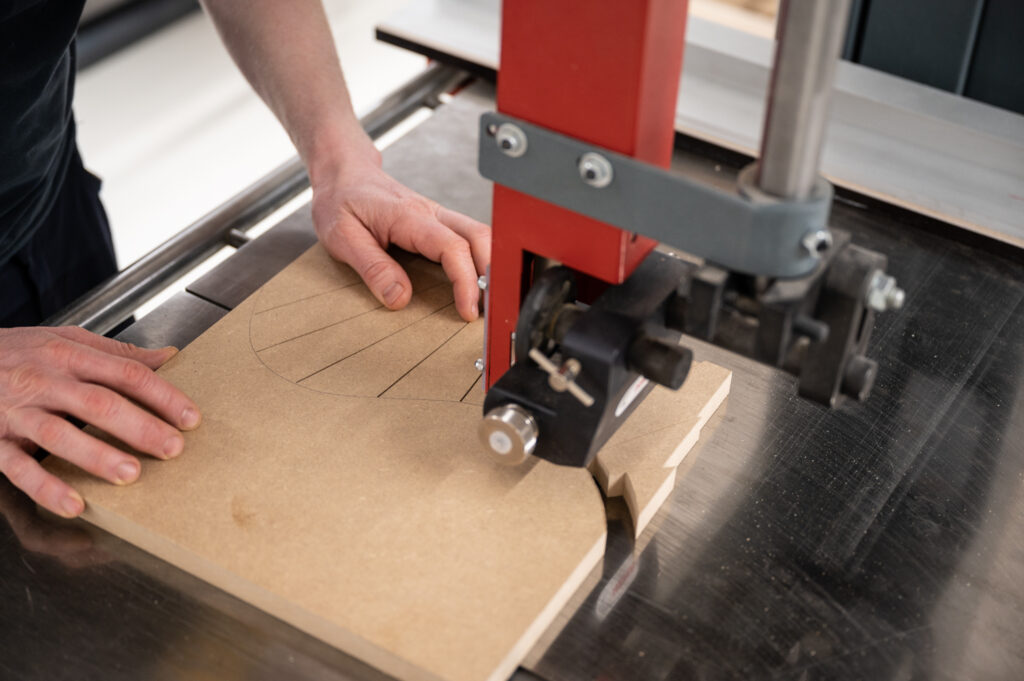
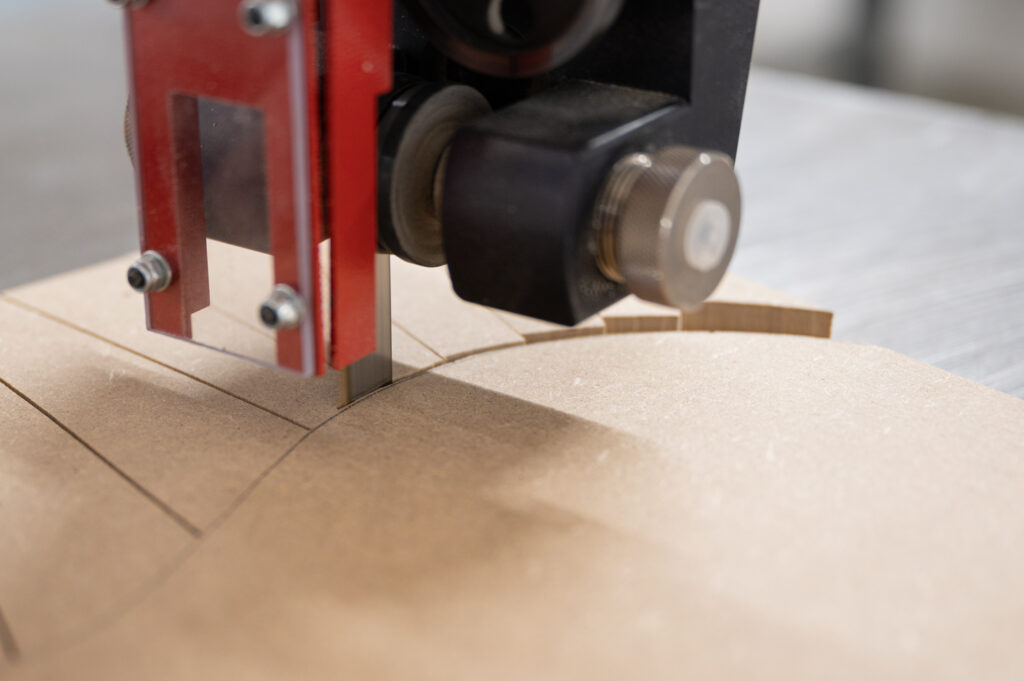
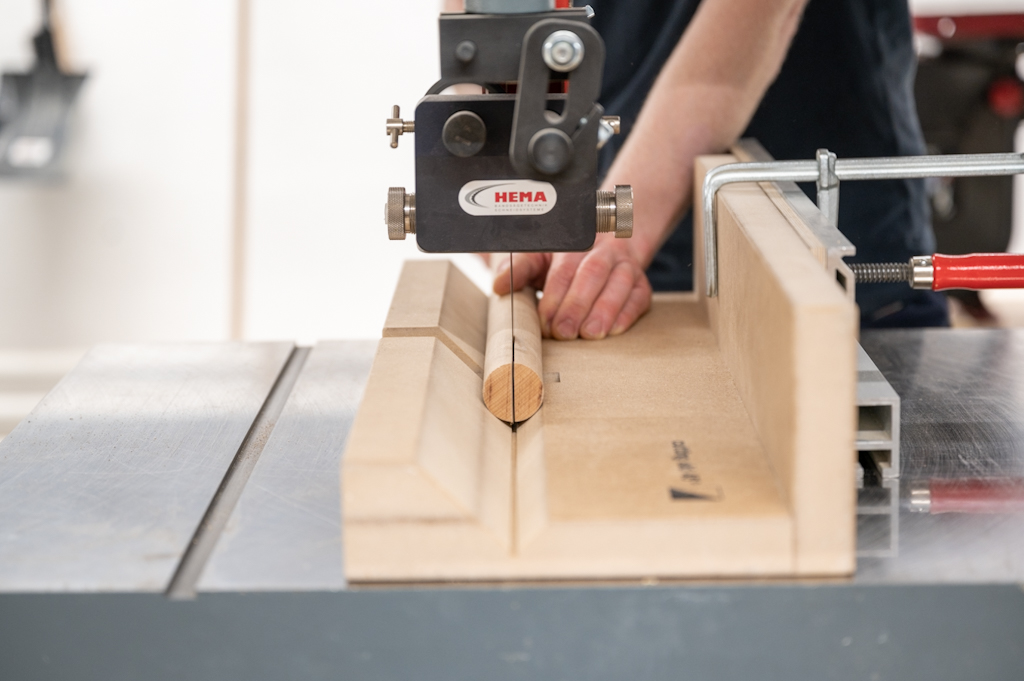
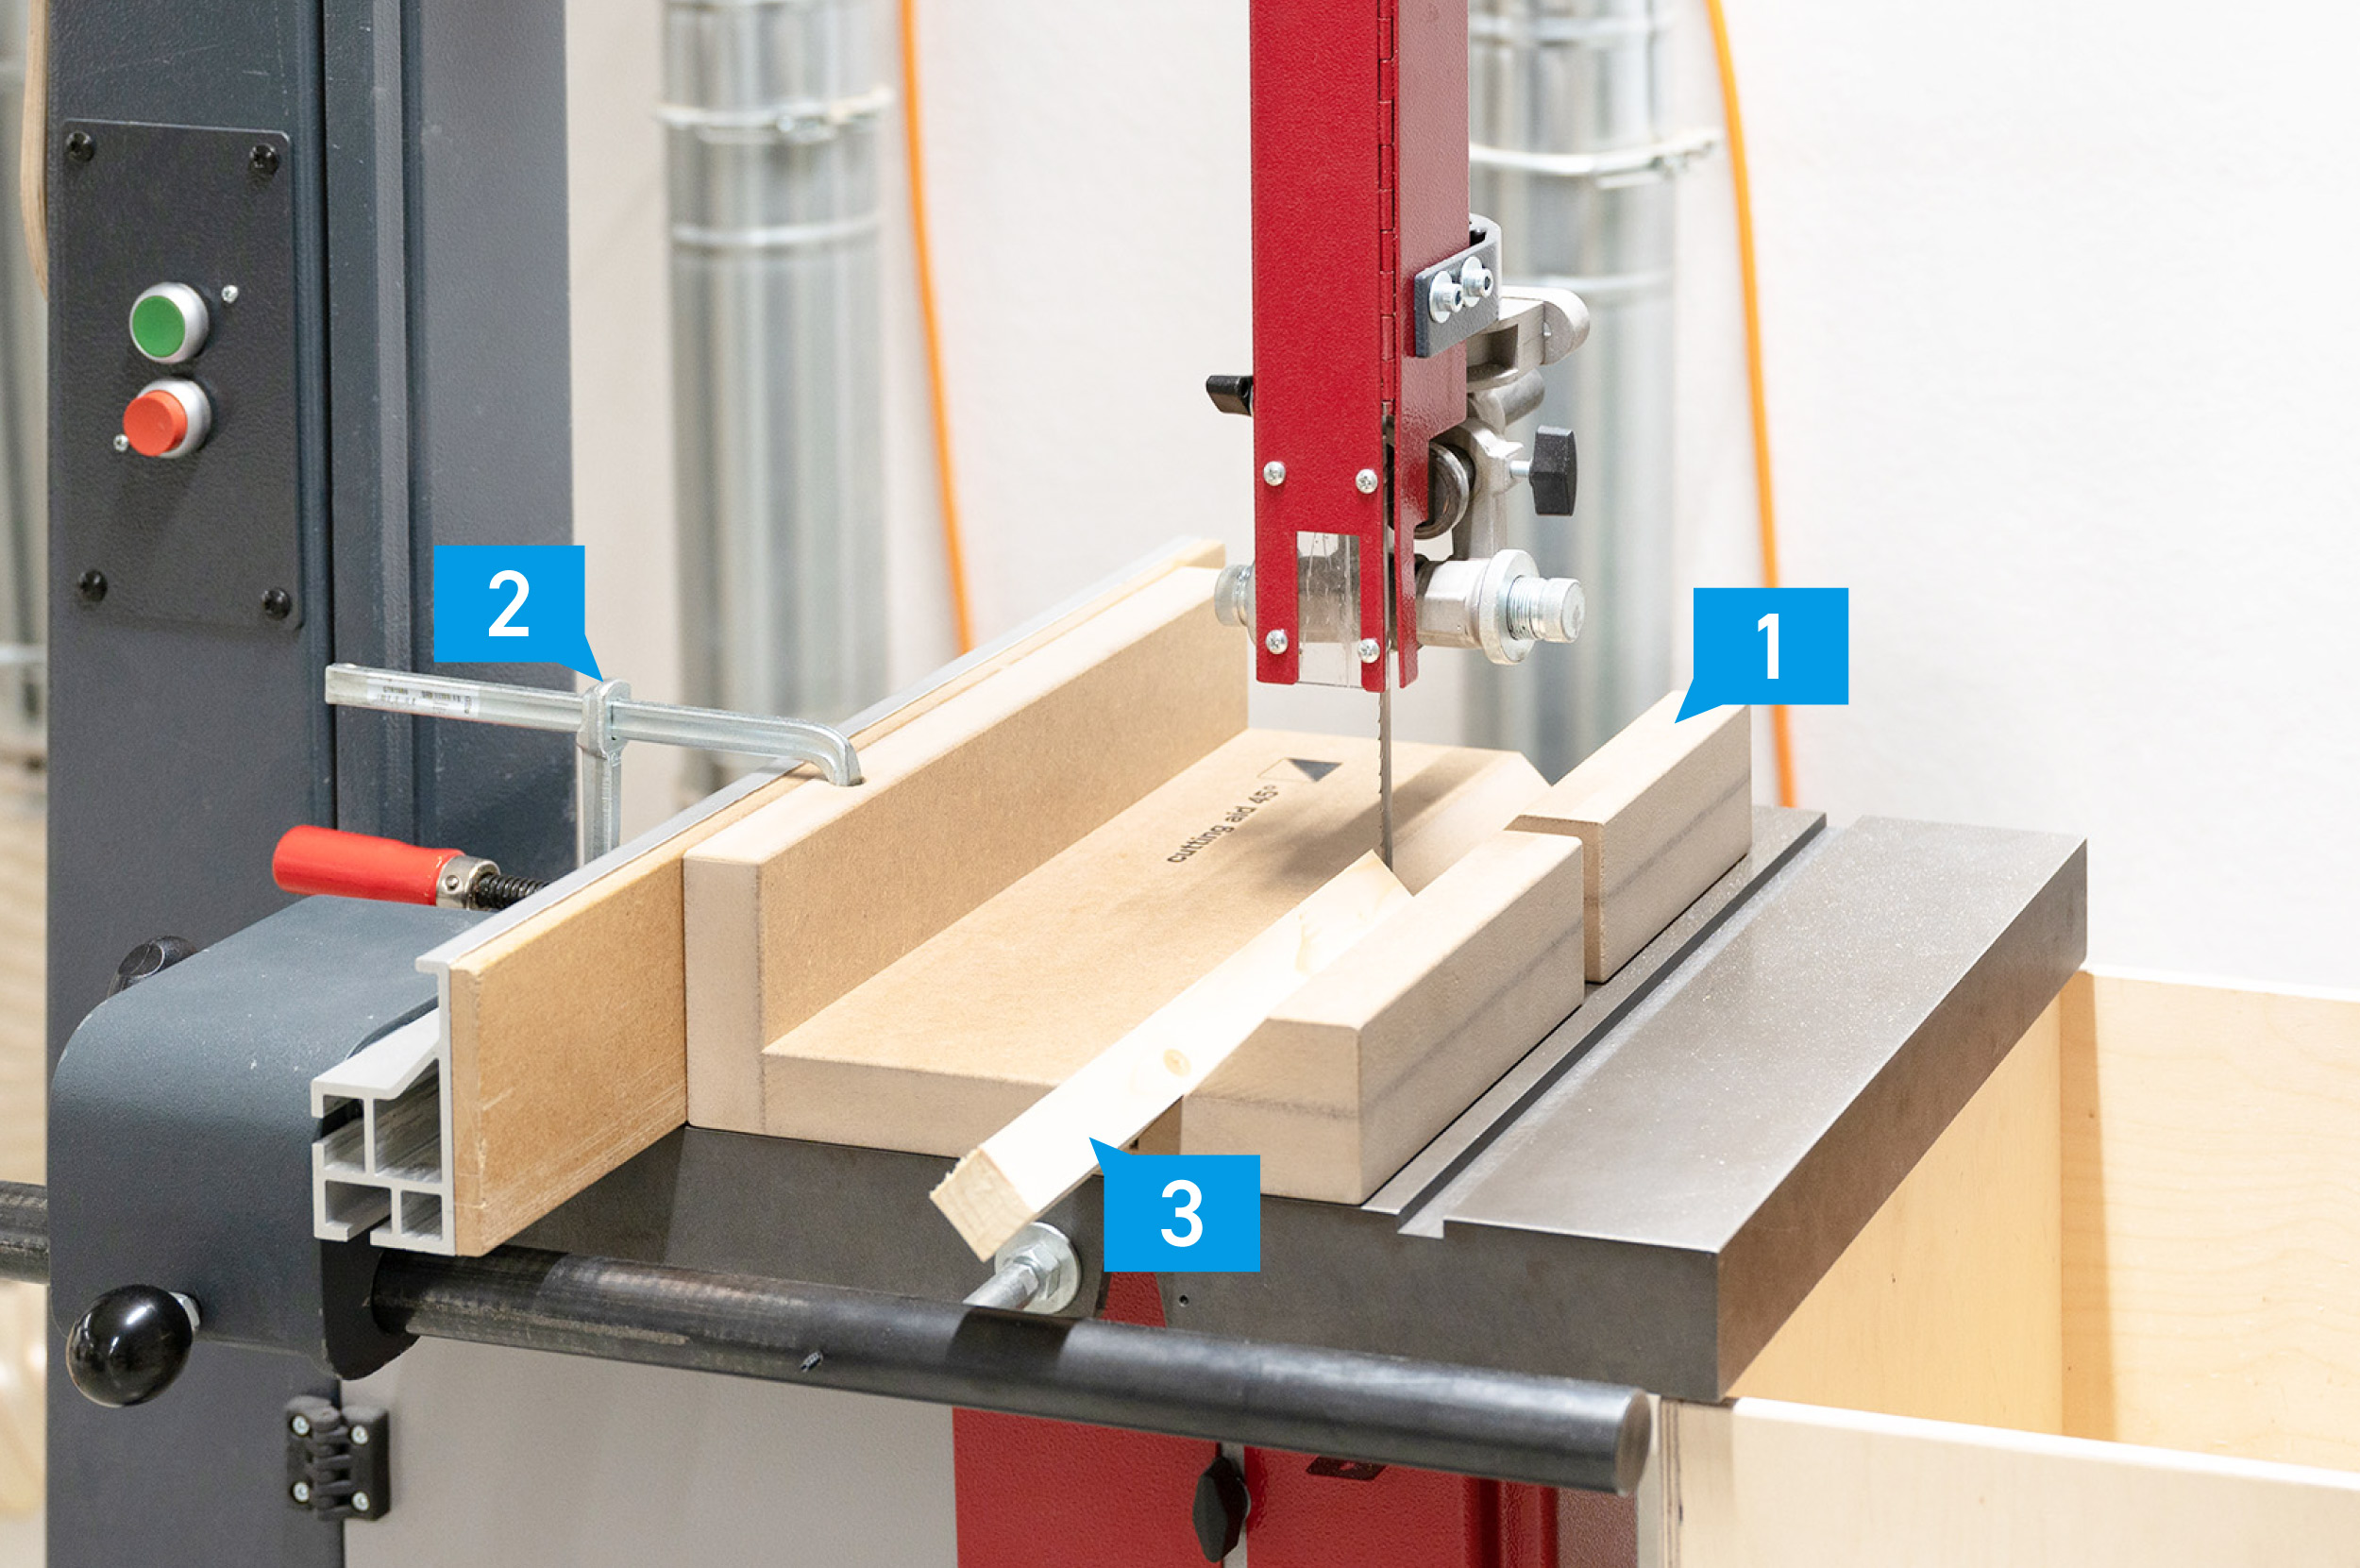
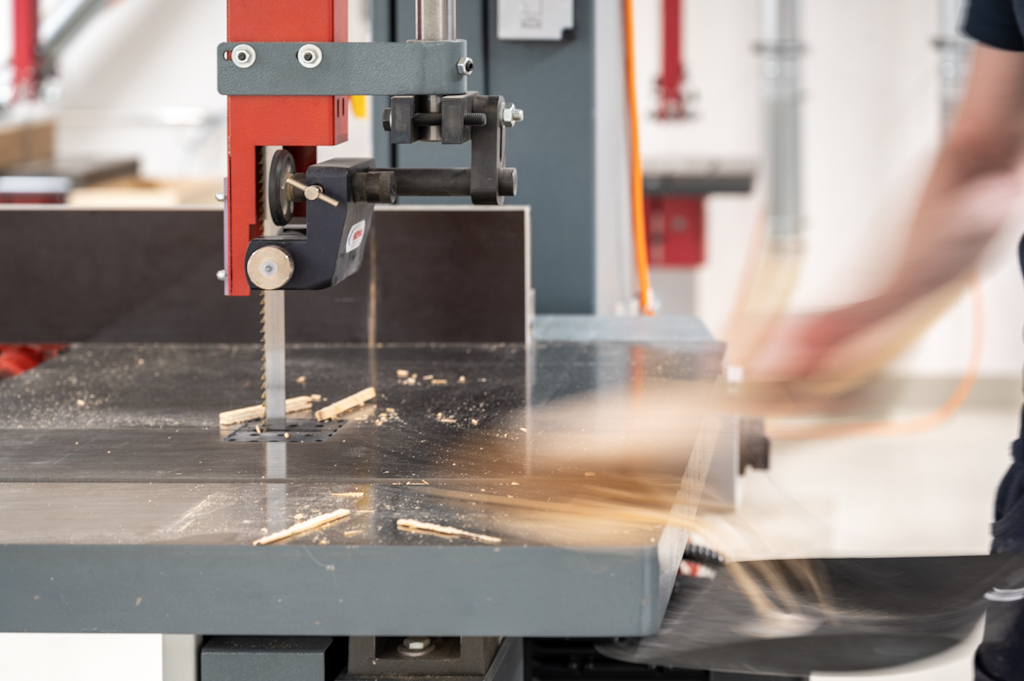
The bandsaw is one of the safest machines in the wood workshop if a couple of basic rules are considered before turning on the machine. The machine is mainly used to prepare stock for sanding or planing. The proper use and adjustment of the blade guard, the push stick, and the push block dramatically decreases the risk of injury and helps with accurate cuts. The workpiece must rest securely on the work table at all times, and custom setups must be developed for round stock or workpieces with no flat side.