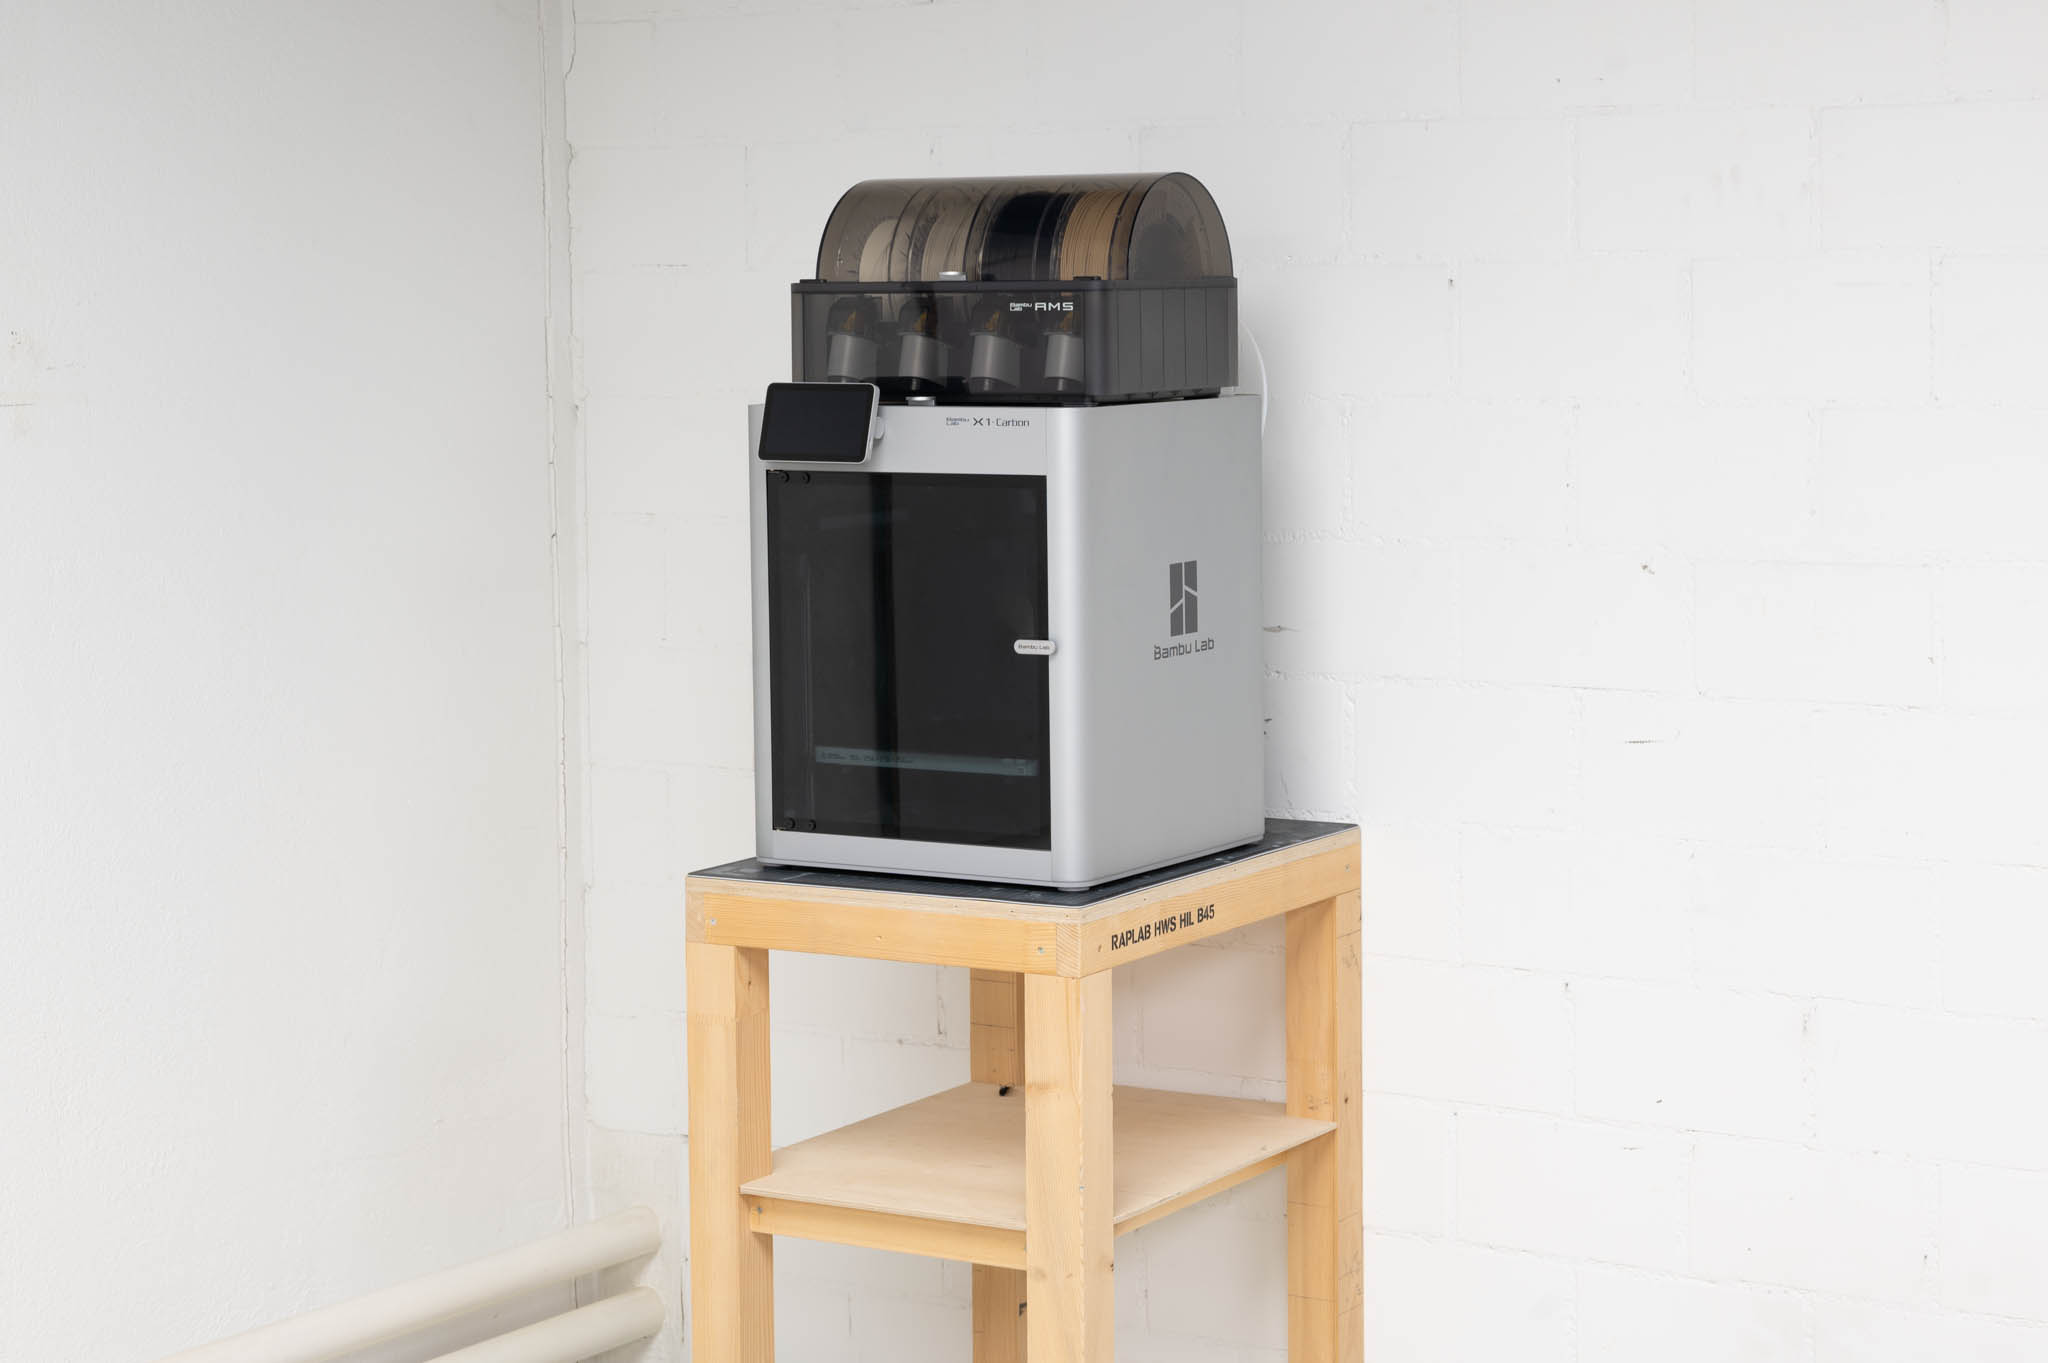
Bambu Labs X1 3D printer

  1. Export your 3D file to STL or 3MF
  2. Slice the exported file in Bambu Studios and upload to a micro SD card. Use the following settings:  Bambu Lab X1 Carbon 0.4 nozzle – Textured PEI Plate – Generic PLA
  3. Turn on the machine
  4. Put the SD card in the machine.
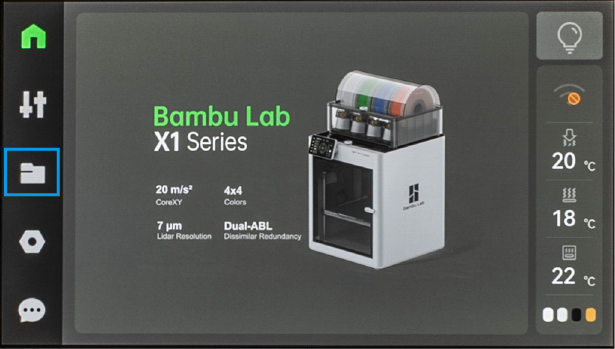
  5. Navigate through the touch screen and select your file.
  6. Wait with the printer until the first layer is complete before leaving the machine.
  7. Come back to remove your print from the print bed once complete.

Location:  ONA
Cost: Free
Area: 250x225mm
Height: 250mm

PLA filament, 1.75mm:
White, grey, black and beige – provided by the Raplab.
  • Download the Bambu studio software onto your personal computer.
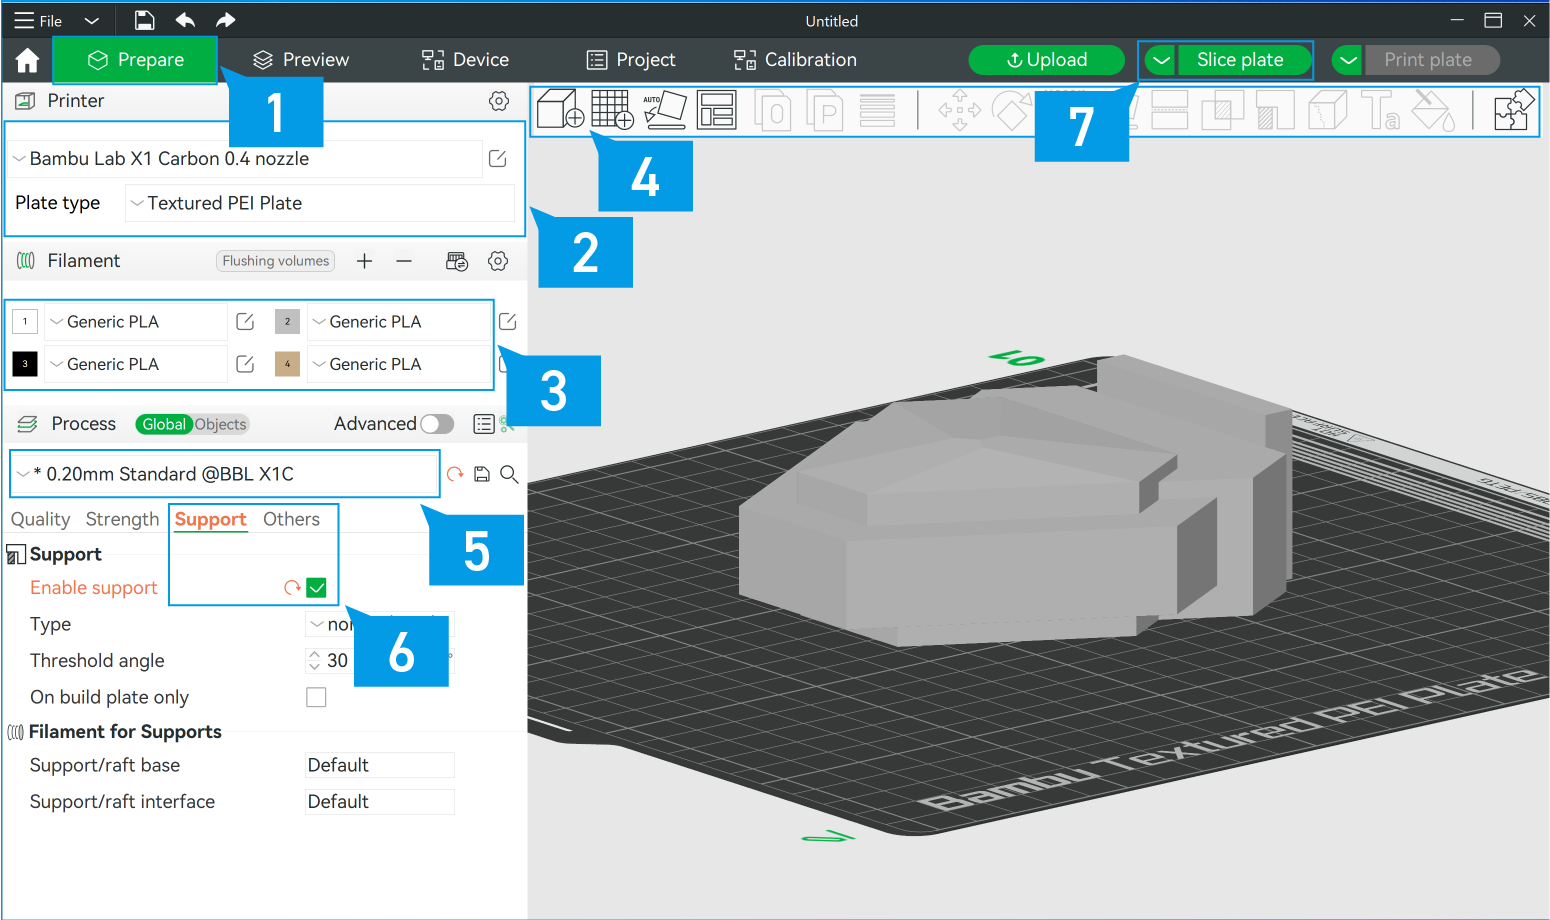
  • Click on the prepare button. (1)
  • Select the correct printer and plate type (2): Bambu Lab X1 Carbon 0.4mm nozzle + Textured PEI Plate
  • Select the correct filament settings (3): Generic PLA for all 4 selections. Colours: 1.White 2.Grey 3. Black 4. Beige
  • Import your model by pressing the add button. (4) The model can be altered with the use of buttons under the same toolbar. Such as “scale”, “rotate” and “lay on face”.
  •  Right click on your model and select “Change Filament” to select the desired colour of your model.
  • Select a  preset. (5) “0.2mm Standard @BBL X1C” is the most commonly used setting. Keep in mind that the lower the layer height the longer the print will take to finish and may be more prone to failing.
  • The settings can then be further adjusted under the “Quality”, “Strength”, “Support”, and “Others” tabs.
  • If your model has overhanging parts, be sure to select “Enable supports” (6)
  • Once happy with the settings, click the Slice plate button (7)
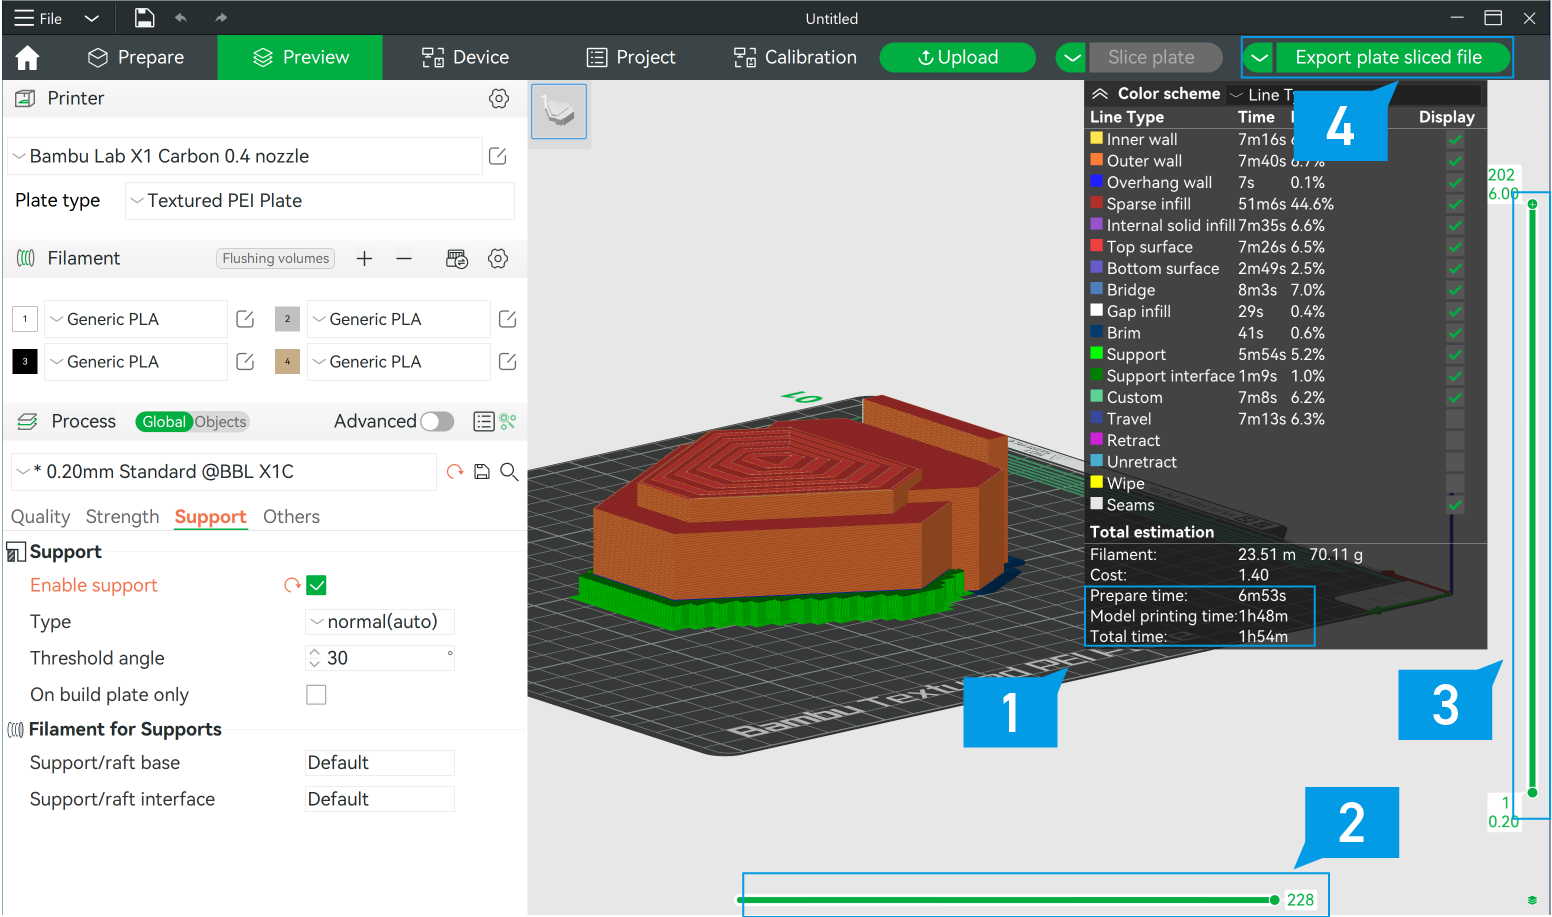
  • Check the print time. (1) Bare in mind that the machines will be turned off at closing time. 
  • Analyse the model using the sliders (2) & (3).
  • Adjust the previously made print settings if needed.
  •  Press “slice plate” again if changes are made.
  • Click the dropdown arrow (4) and select “Export all sliced file”. Then click on the “Export all sliced file” button (4).  
  • Save the file to a Micro SD card.
  • Press the standby button to turn on the machine and place the SD card into the card terminal.

Touch the folder icon on the touch screen.
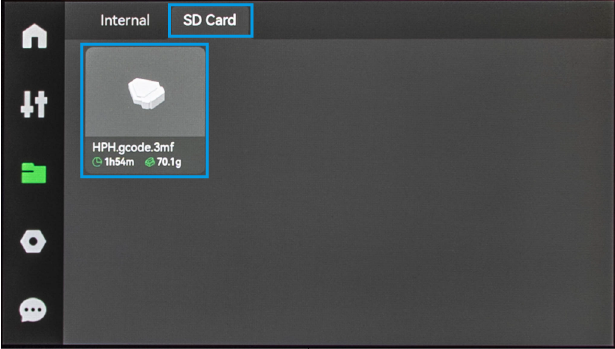
Select the SD card icon and followed by your file
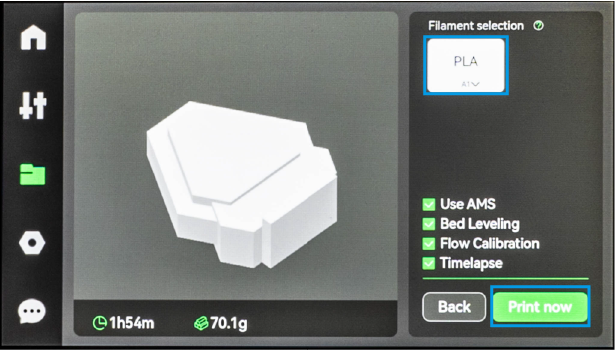
Touch the PLA icon to make a last minute change to color if needed.

Then touch print now.
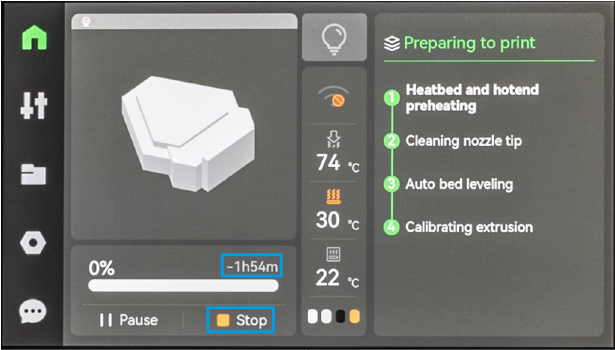
 

Wait with the machine until the first layer is complete. Press the stop button if something goes wrong.

If all goes well. Set a timer on your phone to know when to pick up your print.
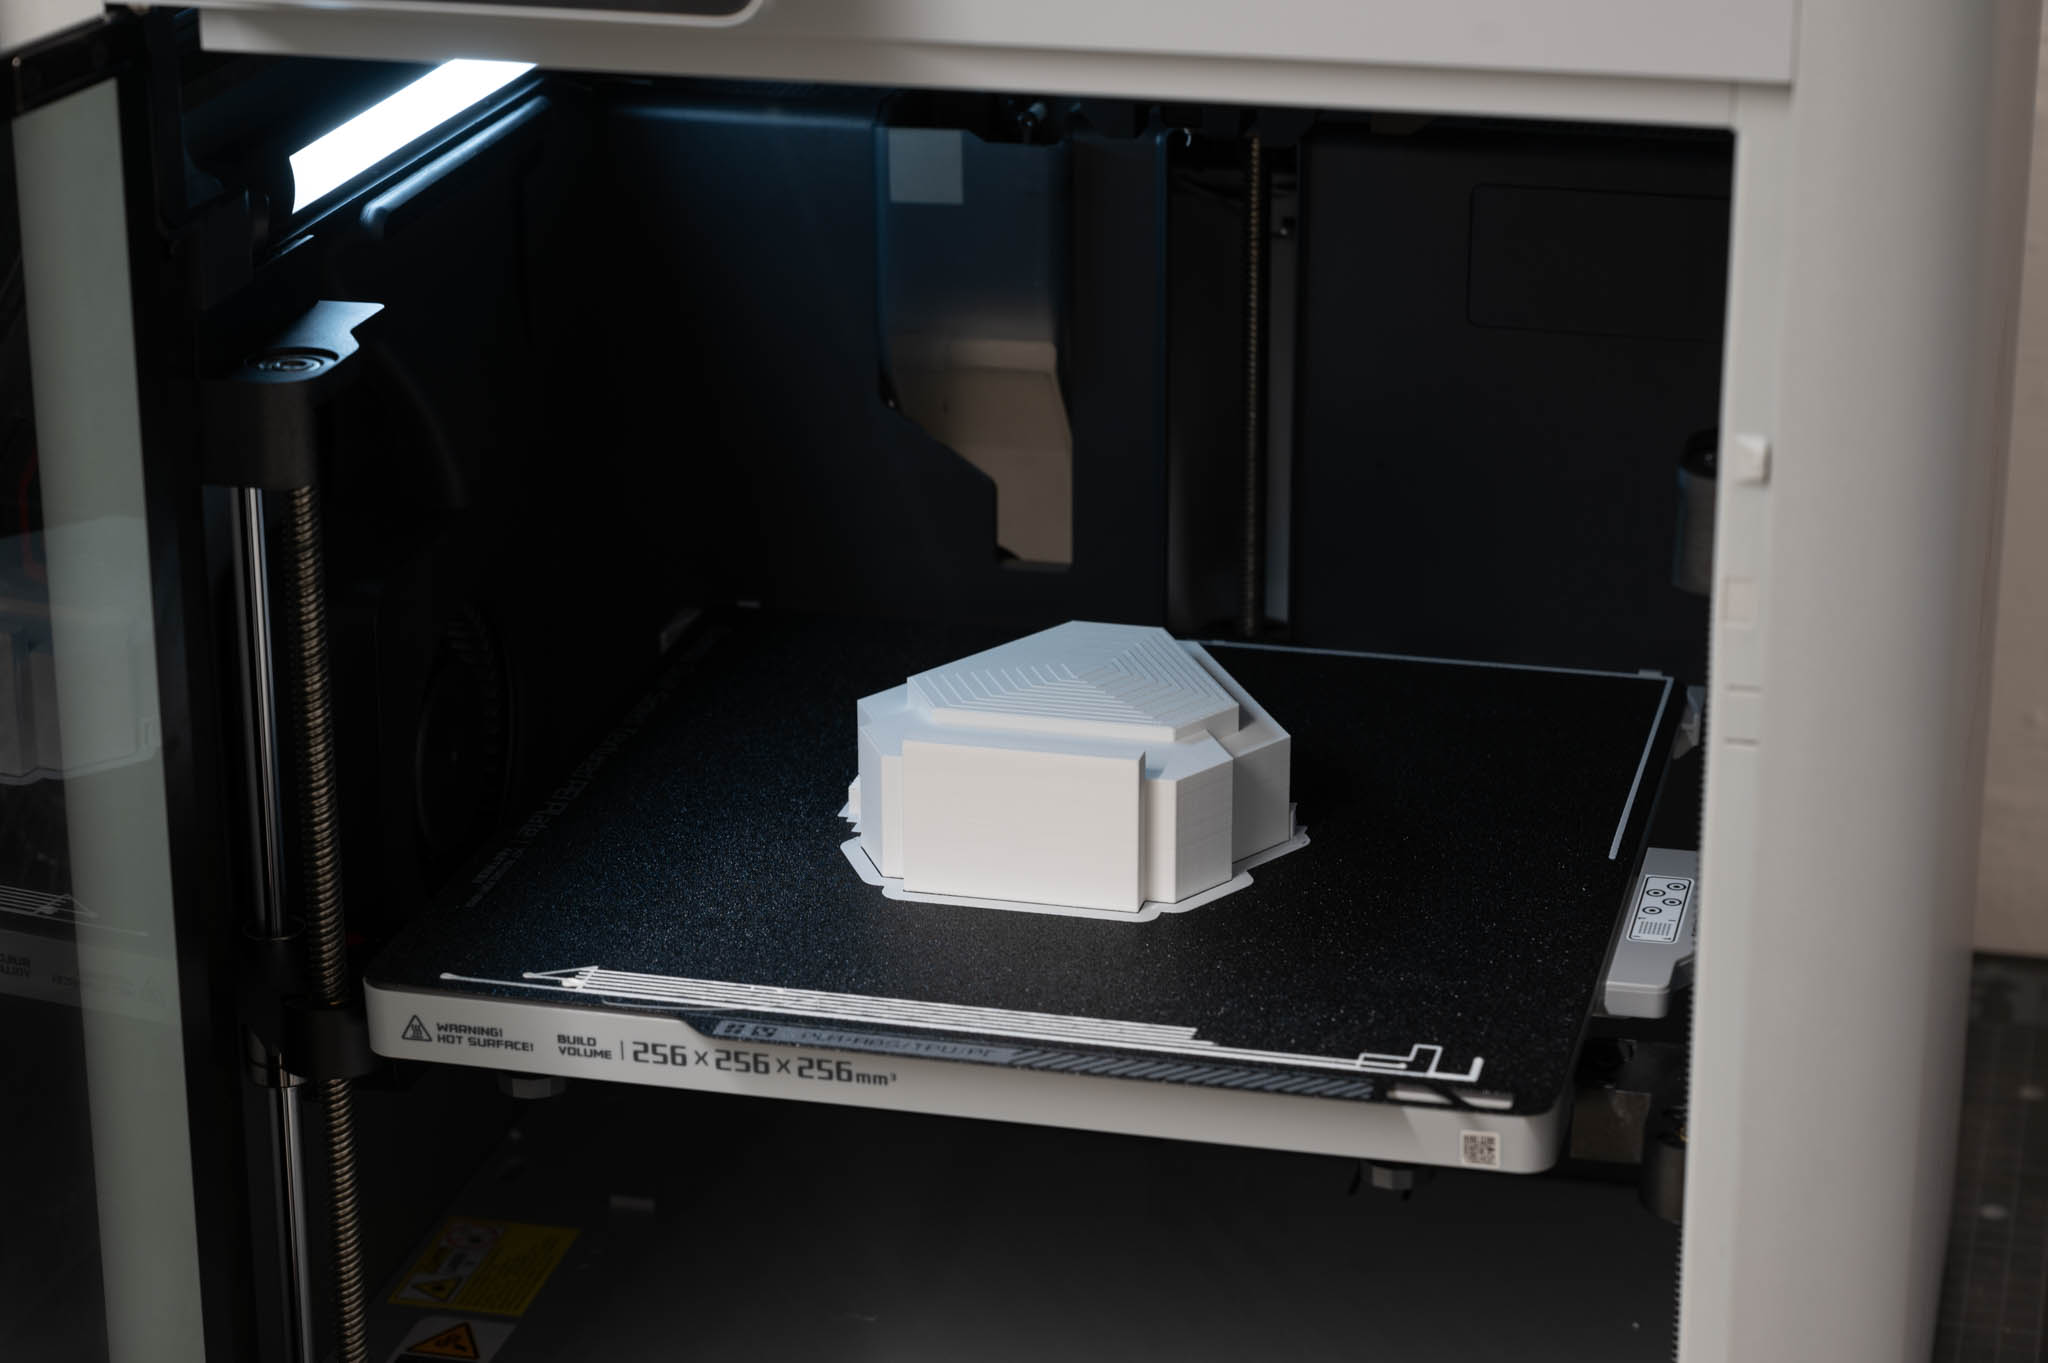
  • Lift out the build plate and bend slightly to remove the print
  • Pick off any print material stuck to the build plate with the plastic scraper
  • Ensure there is no residue on the heat bed before placing the build plate back. Make sure it is positioned in the correct orientation.
  • Remove your SD card