The belt sander provides a fast and efficient way to clean up the edges of boards and shape objects with a convex curvature that can not be sanded on the disc sander due to size limitations. In model building, the belt sander is primarily used to clean up the edges of landscape models and sand parts for facades or similar larger-scale elements to final dimensions. The tilting function of the machine allows for the precise sanding of miters to join components seamlessly. Small parts are not to be used on this machine due to the force sanding exerts on the workpiece, making work holding difficult.
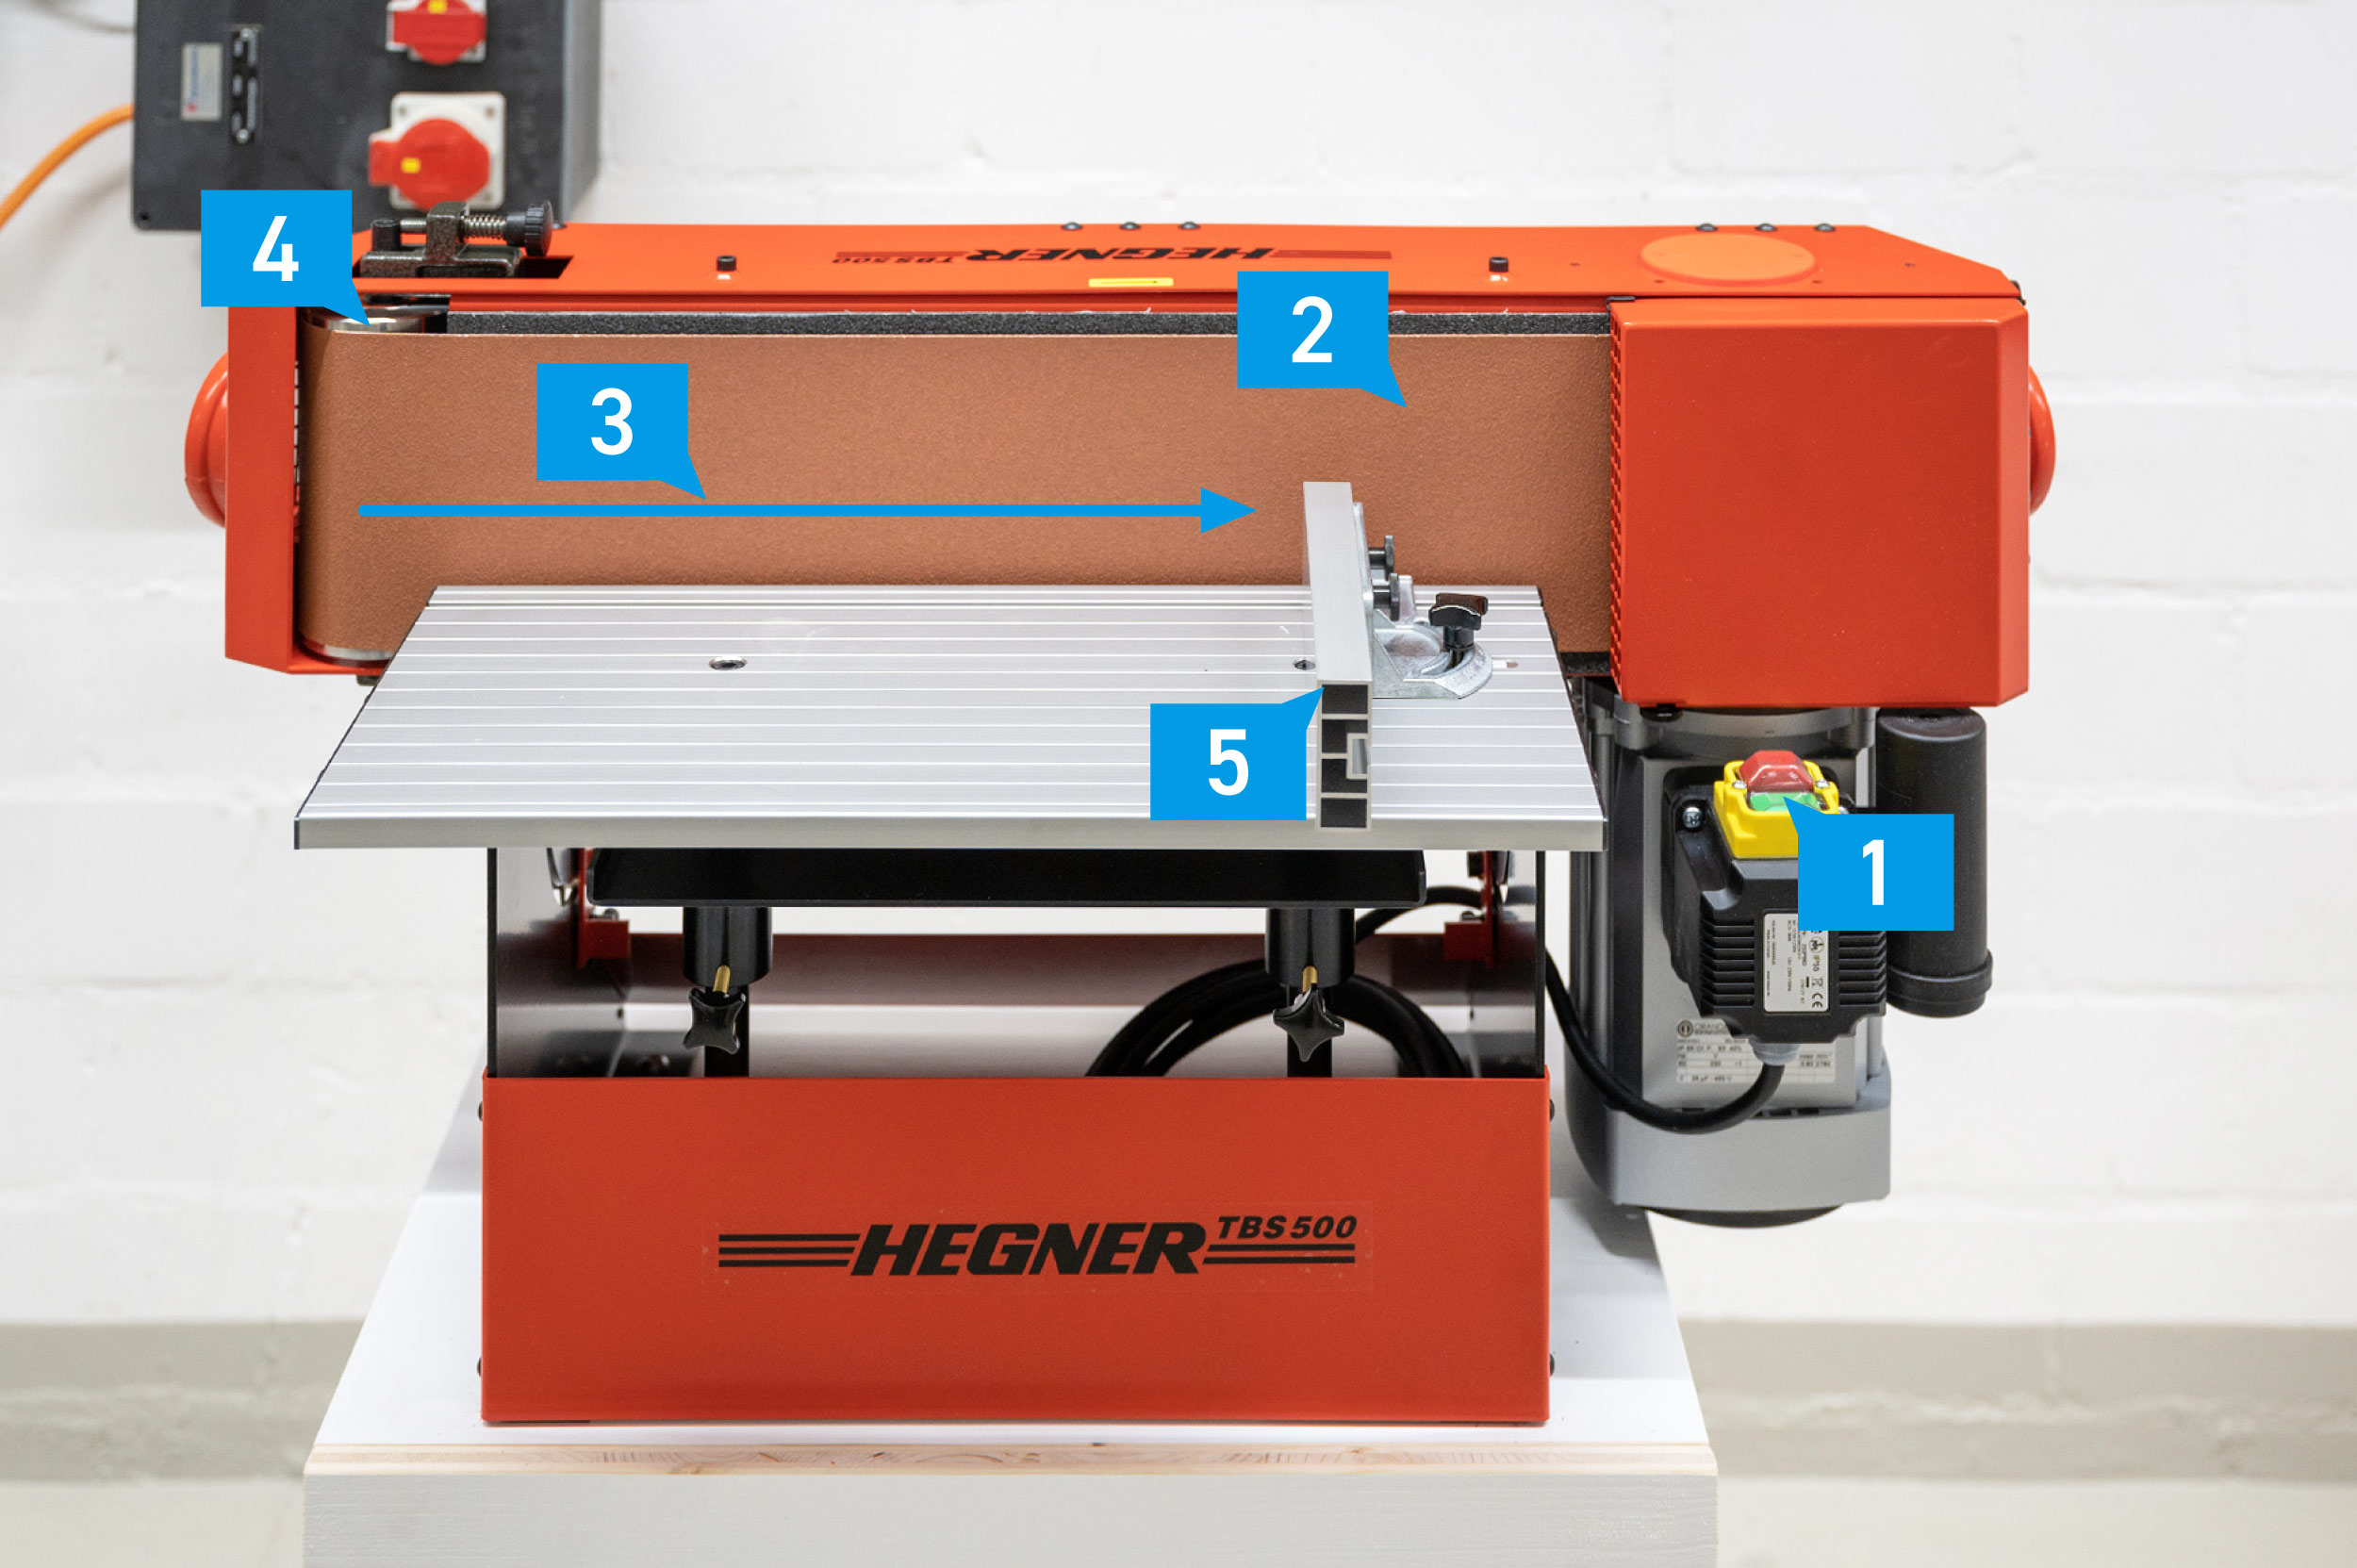
Belt Sander Overview
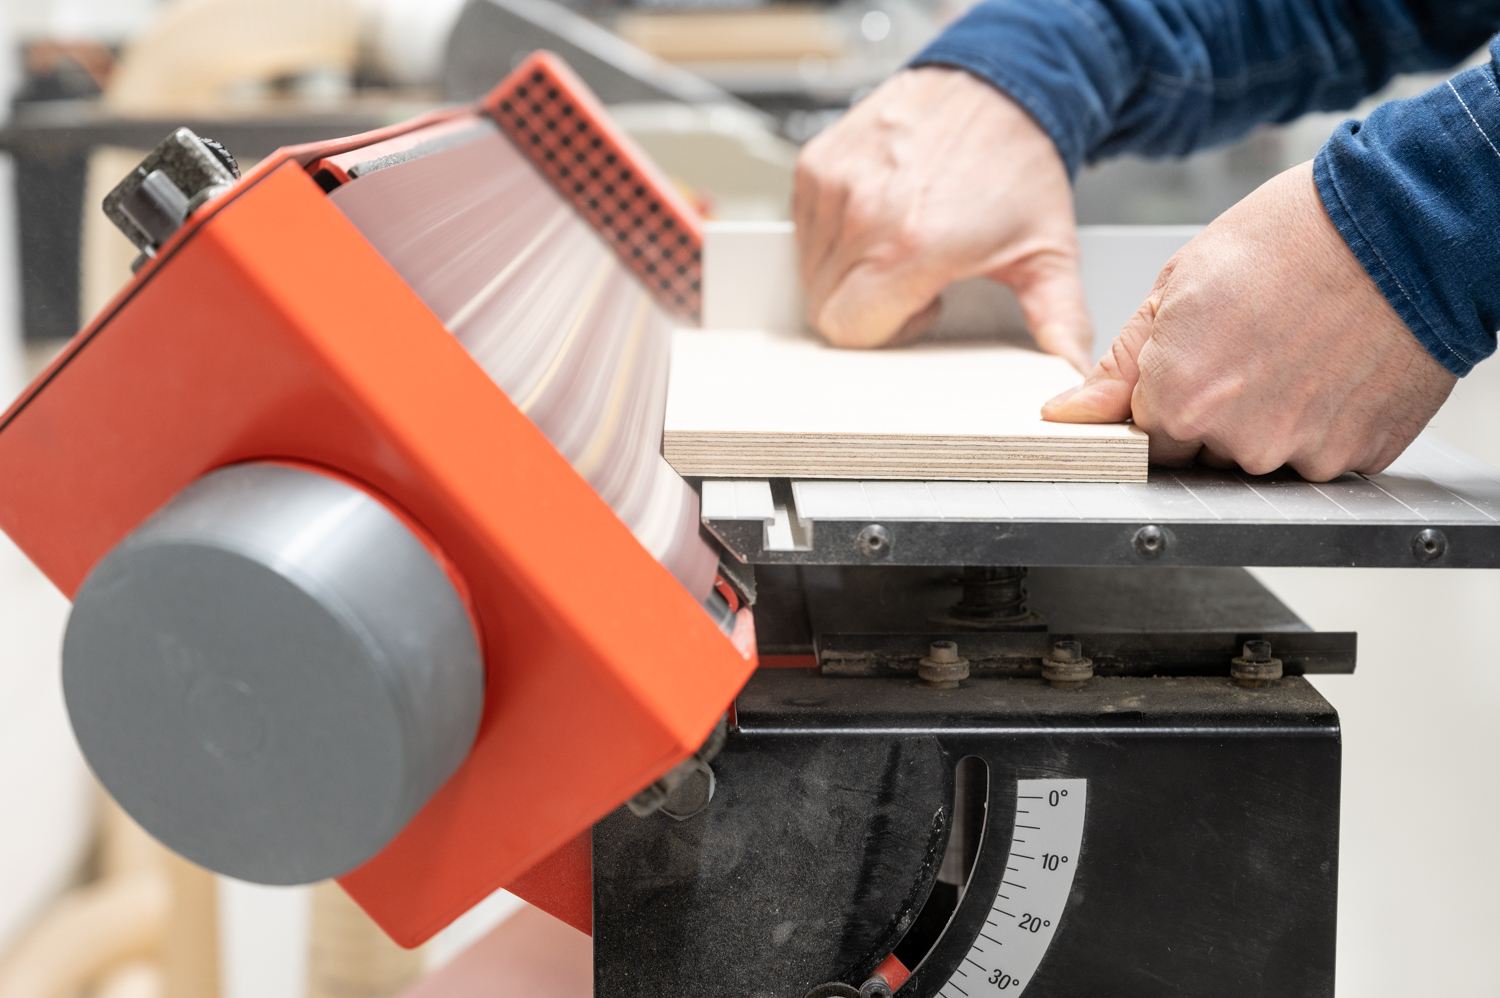
#1 Power switch #2 Sanding belt #3 Belt direction #4 Spindle #5 Miter Gauge
Machine Handling
How To
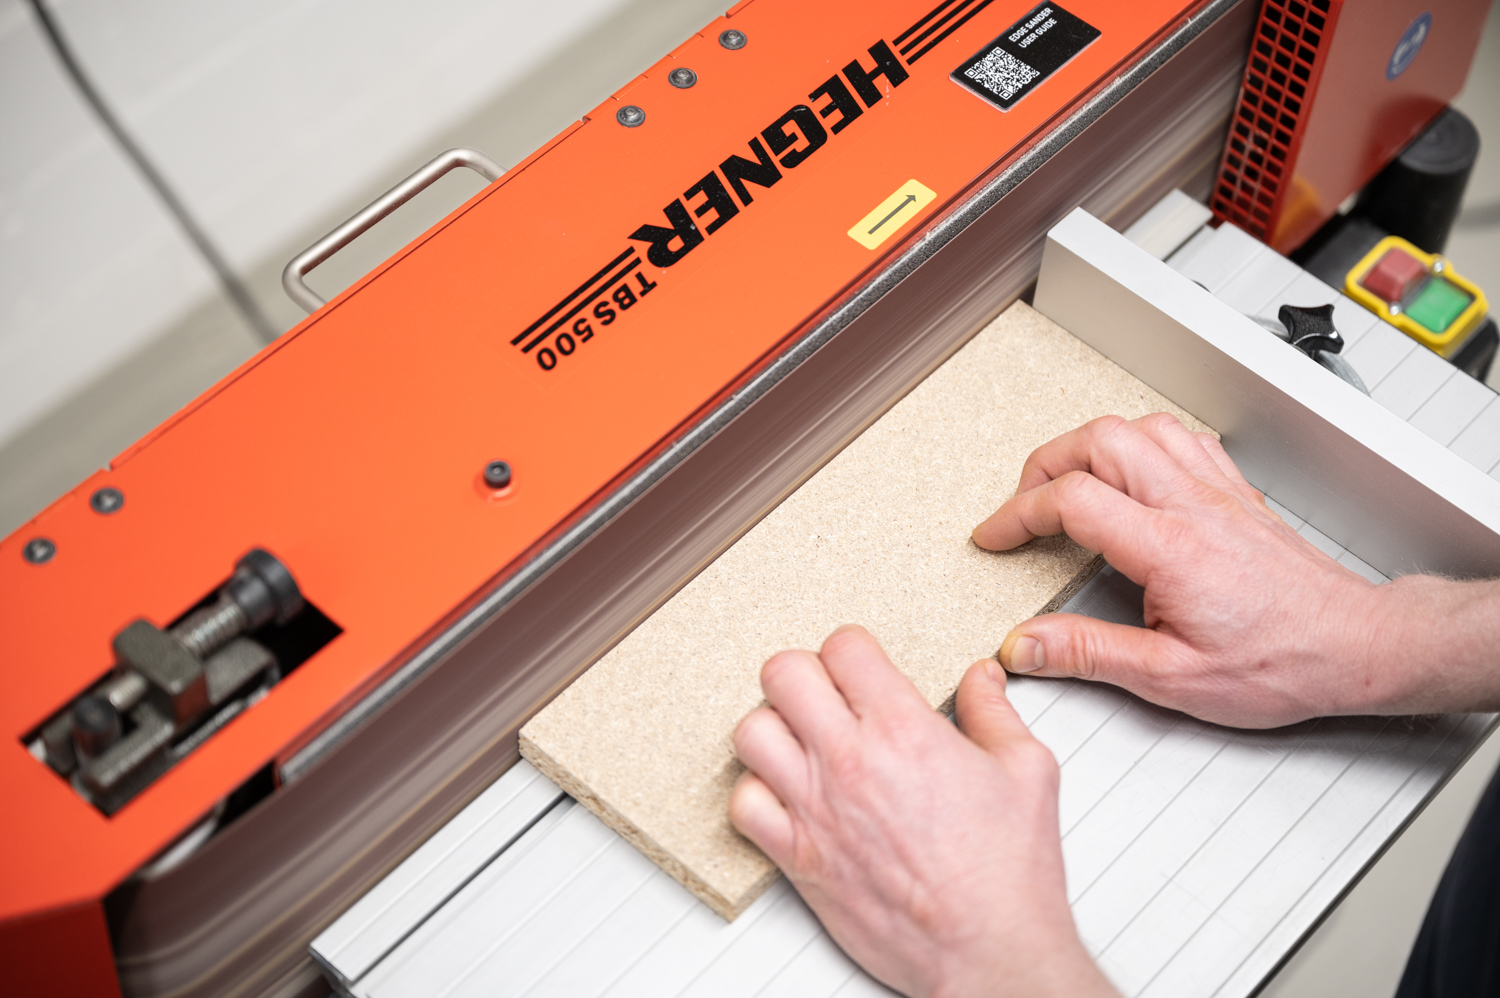
To clean up the edge of a workpiece hold the part with both hands and work from right to left, against the belt direction (3) to counteract the force from sanding. Do not advance your workpiece from the left side to avoid injuries.
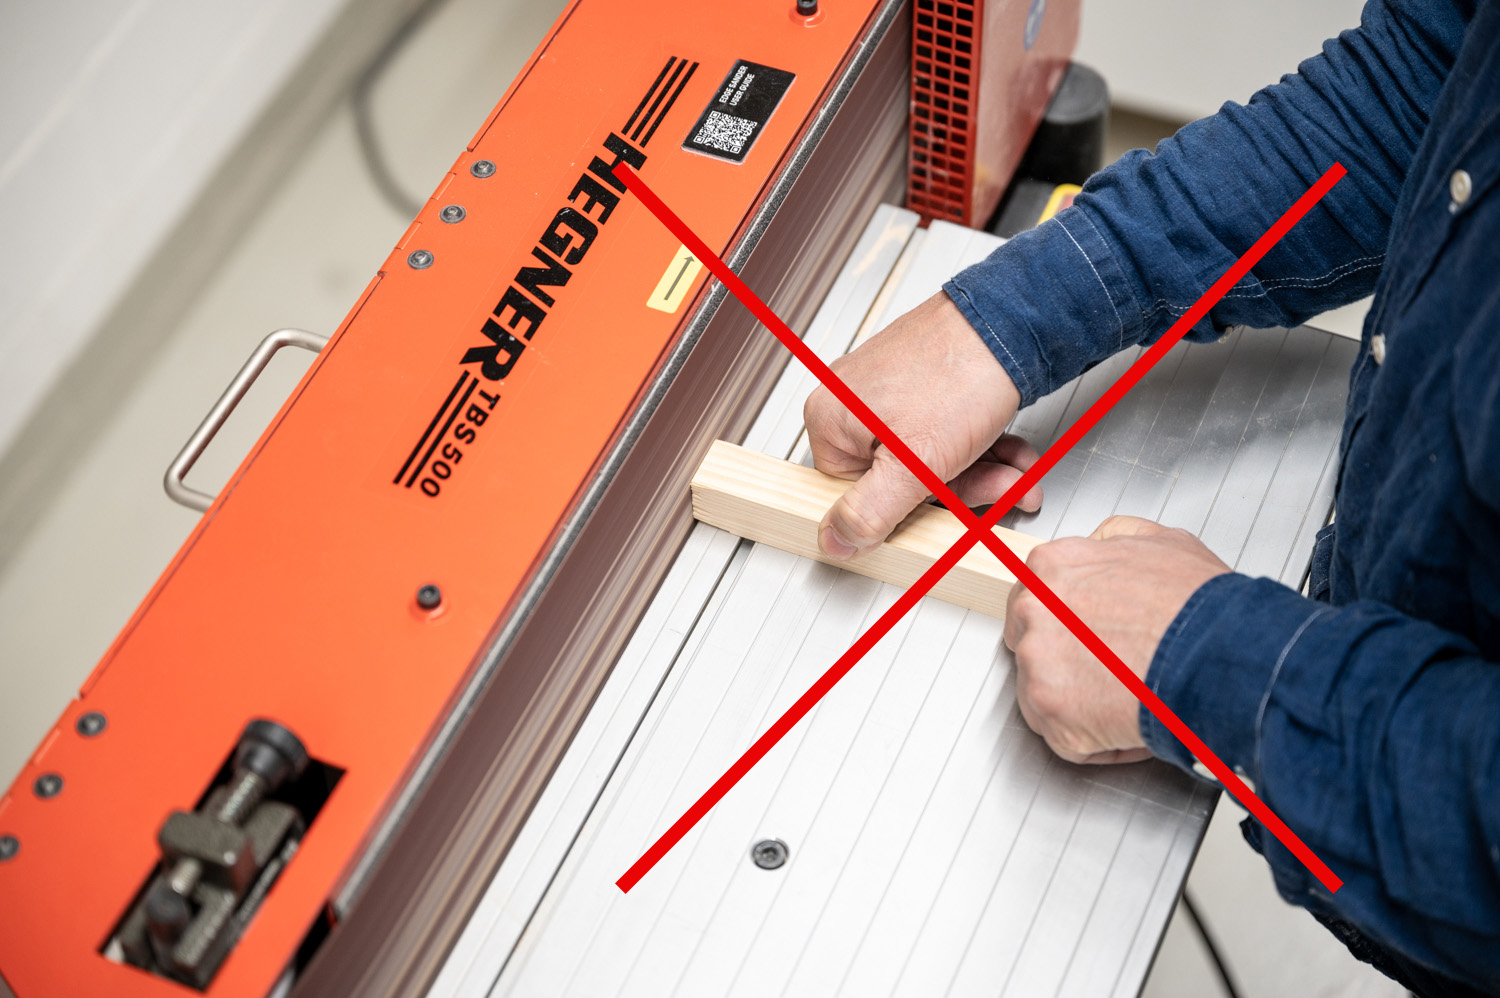
Do not sand the short edge of a workpiece on the belt sander. The right, and far safer option, for this task is the disc sander!
Always support your workpiece on the machine table, and use only light pressure to avoid heat accumulation. Remember: the machine should do the work for you! The belt sander is ideal for removing the last .5mm material; anything more than that should be removed with the bandsaw.
The miter gauge can be used as a backstop to support the workpiece while sanding. Using the backstop helps with accuracy and is an effective way to avoid injury because it prevents the workpiece from getting thrown off the table.
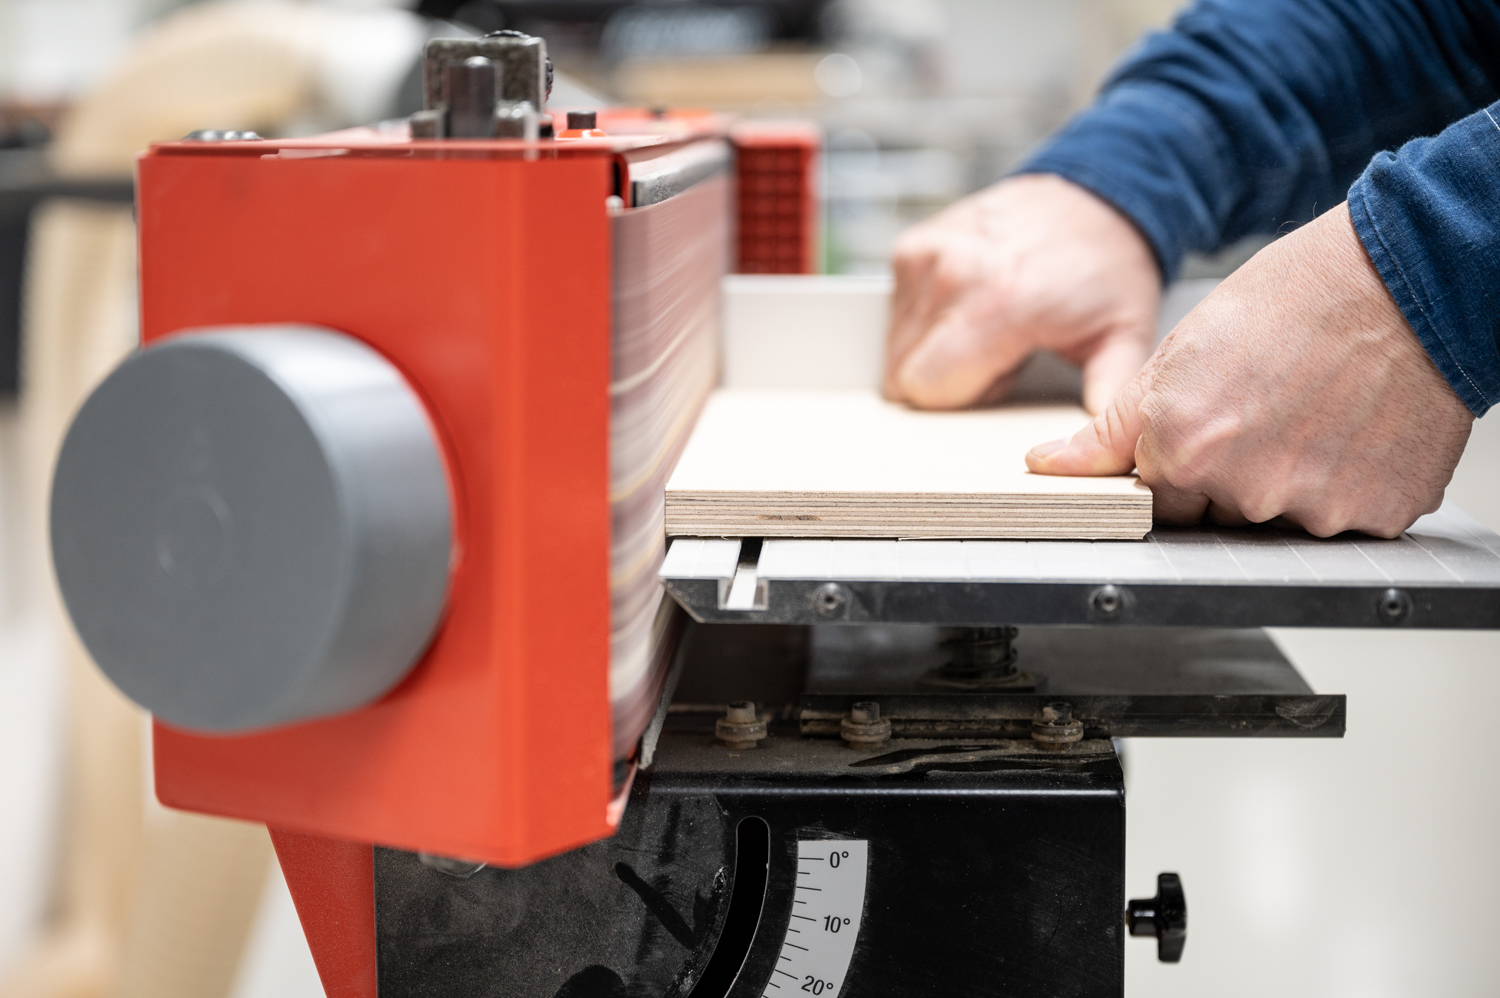
For sanding beveled panel edges, tilt the belt sander to the desired angle and adjust the machine table to avoid more than 2mm gaps between the belt and the table.
Abrasion injury from coming into contact with the sandpaper
Work Safety
Use the miter gauge as a backstop
The workpiece must rest on the machine table at all times
Make sure that the workpiece is appropriately oriented
Small parts should be sanded by hand or with the disc sander
Check the distance between the work table and the sanding belt before turning on the machine and adjust it if necessary
Summary
The belt sander is used for sanding the edges of boards and models. As with any sanding machine, we use it to remove the last millimeter, clean up cuts made with other machines, and not remove substantial amounts of material. Utilizing the miter gauge as a backstop adds an additional safety layer and prevents workpieces from flying off the table.
